Hardfacts Wallas XC Duo
- Diesel glass ceramic hob and vehicle heating in one
- Glass-ceramic hob with one cooking plate + one warming zone
- Hot air heating 0,9 - 1,9 kW adjustable
- With thermostatic control panel
- No open flame
- Cooking power: 1,9 kW
- Fuel consumption: 0,09 - 0,19 l/h
- Power consumption: 0,55 - 0,85 A (during ignition approx. 4 min. 8A)
- Installation dimensions (WxD): approx. 456 x 343 mm
- Installation height: approx. 165 mm
- Dimensions: (WxDxH): 442 x 302 x 165mm
- Exhaust hose length max. 2m
What do you need for the installation?
Basically I would recommend to have the Walles XC Duo installed by a workshop or at least together with someone who has enough know how of cars.
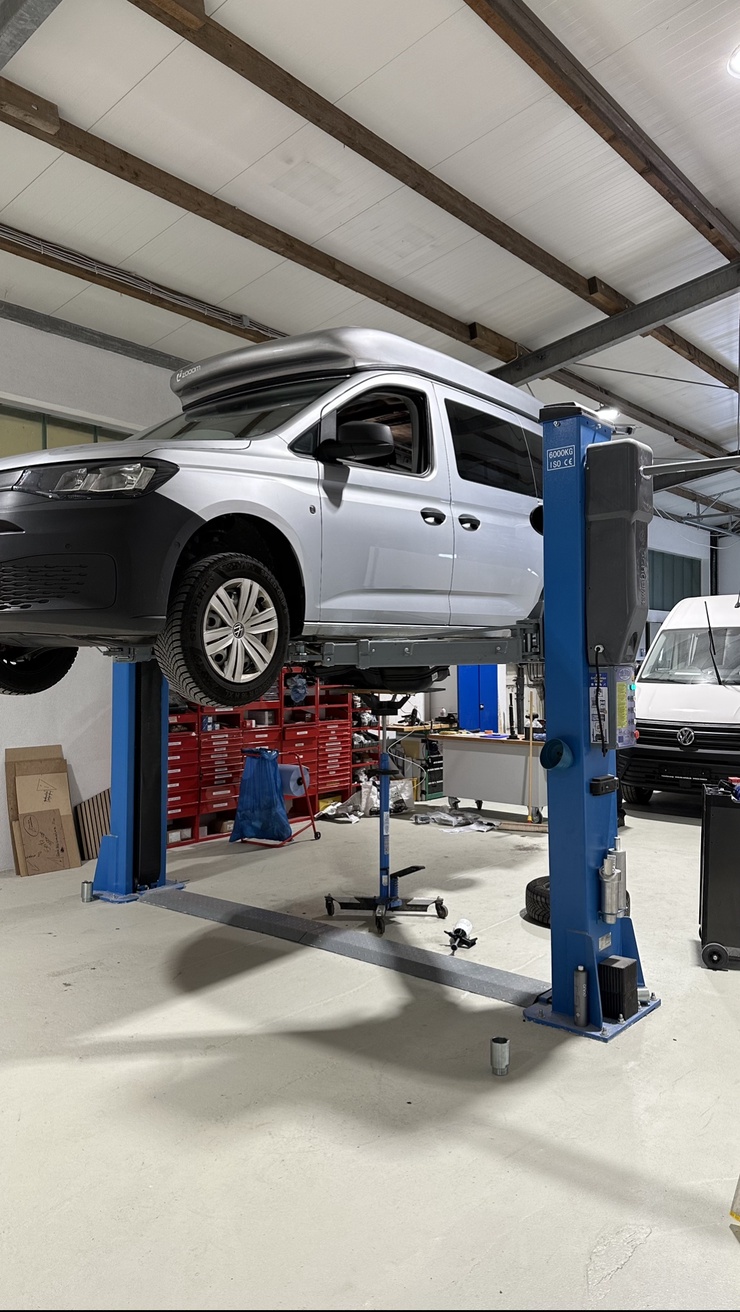
It is best to rent a workshop/garage with a lifting platform, but a pit should also be sufficient.
Required tools:
- Cordless screwdriver
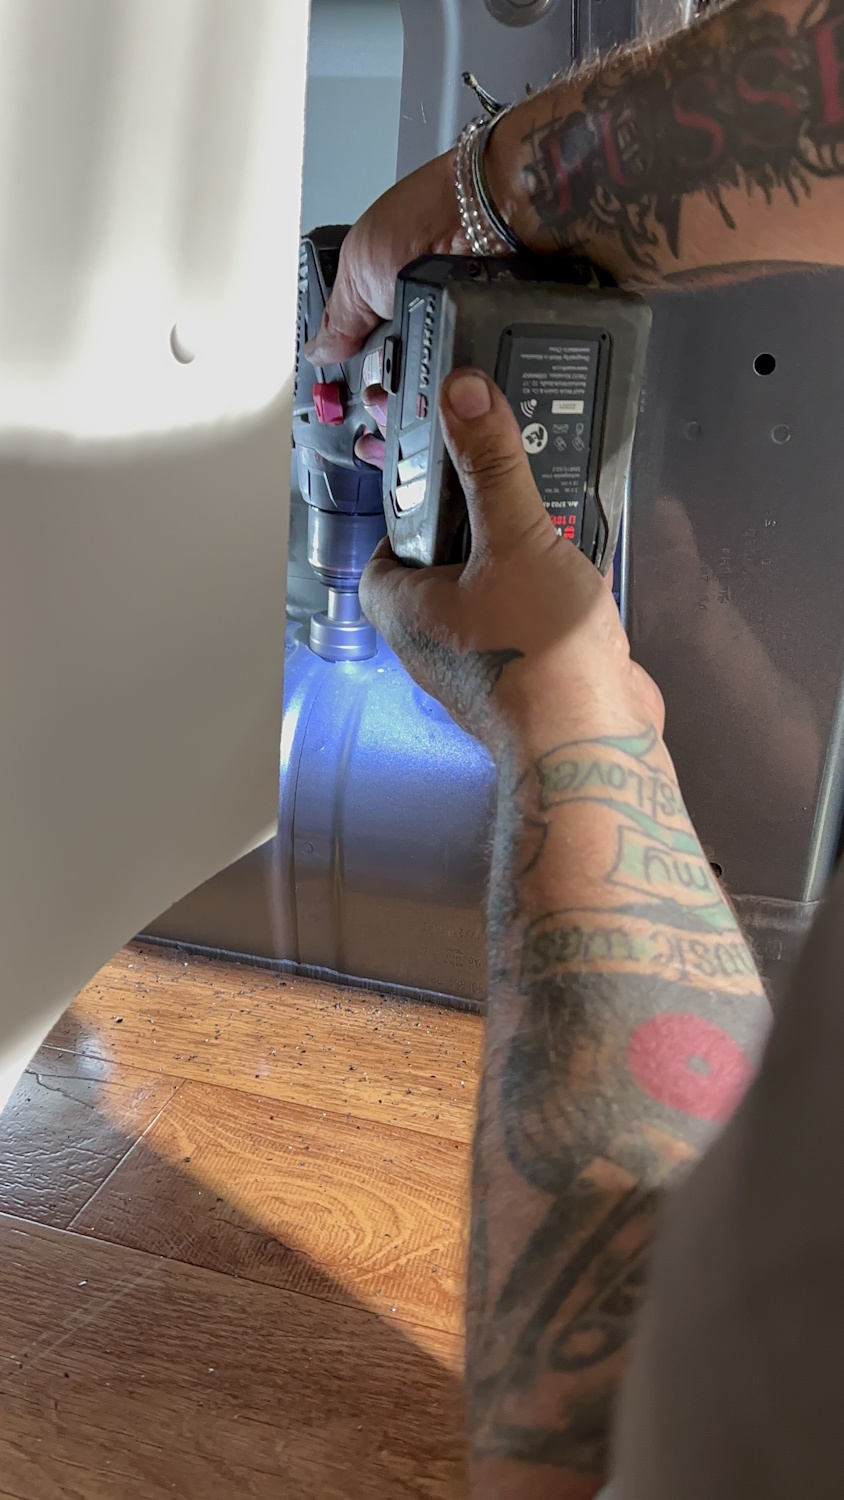
- 43mm hole saw (for drilling the holes for the exhaust pipes)
- A gear jack is helpful
- Various pliers
- Crimping pliers
- 5mm allen wrench
- Drill bits in Ø 2/5/6 mm
- Folding rule
- A sufficiently large bit and nut set with ratchet to loosen various screws
Paneling
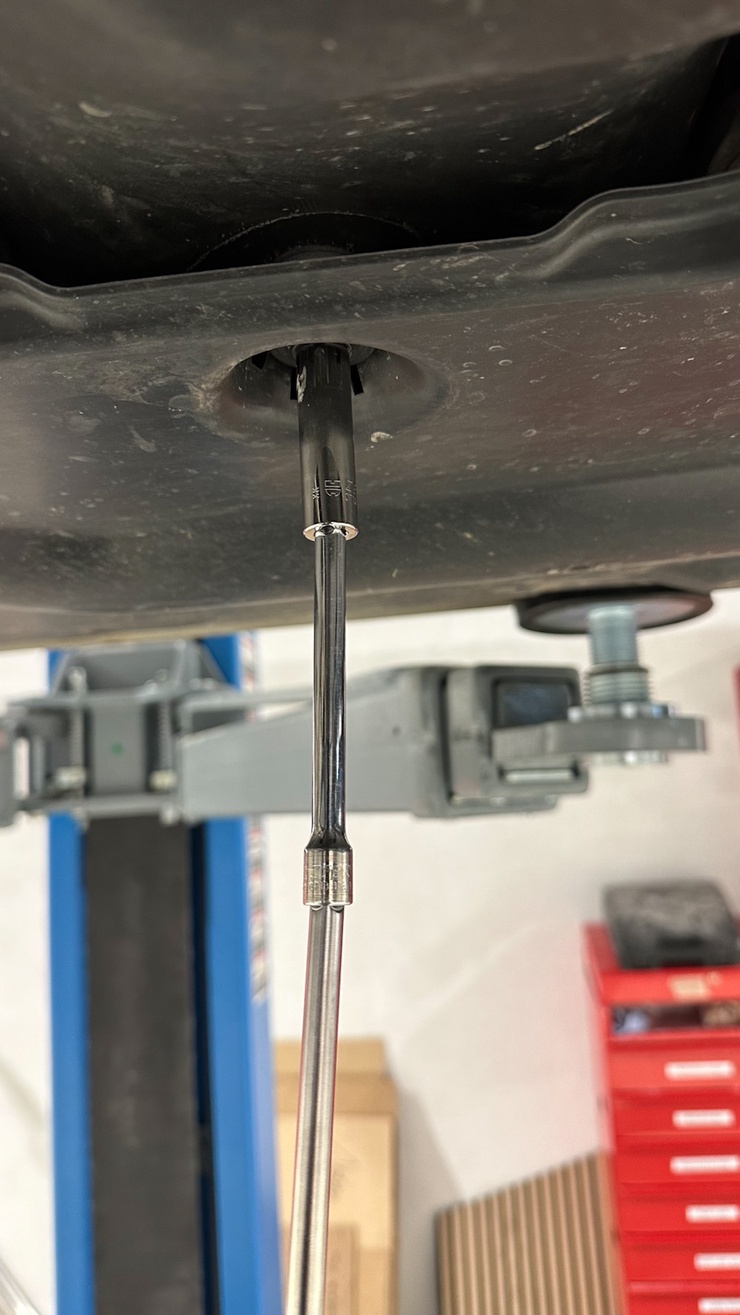
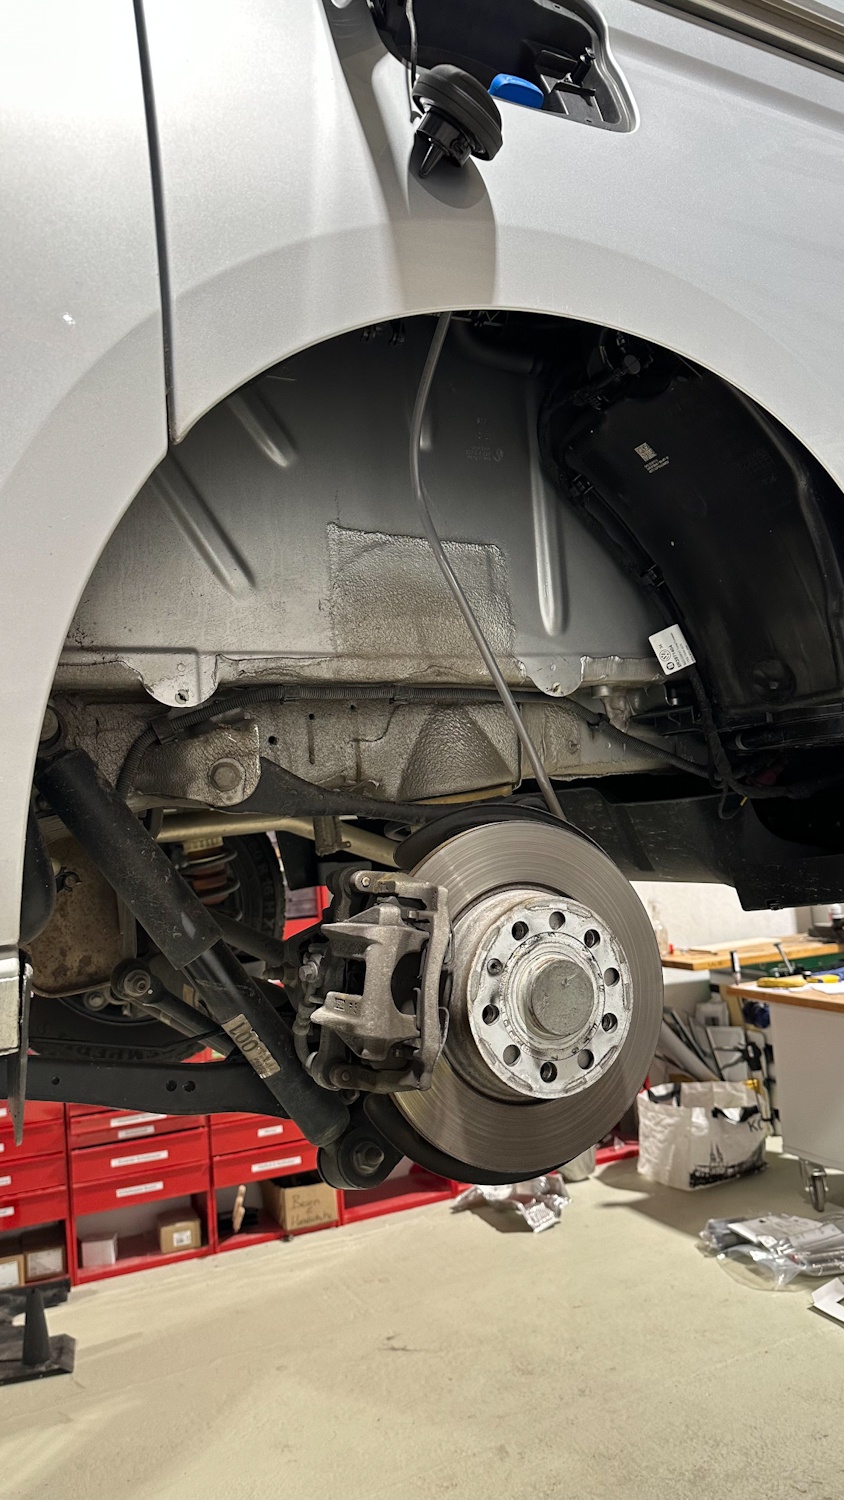
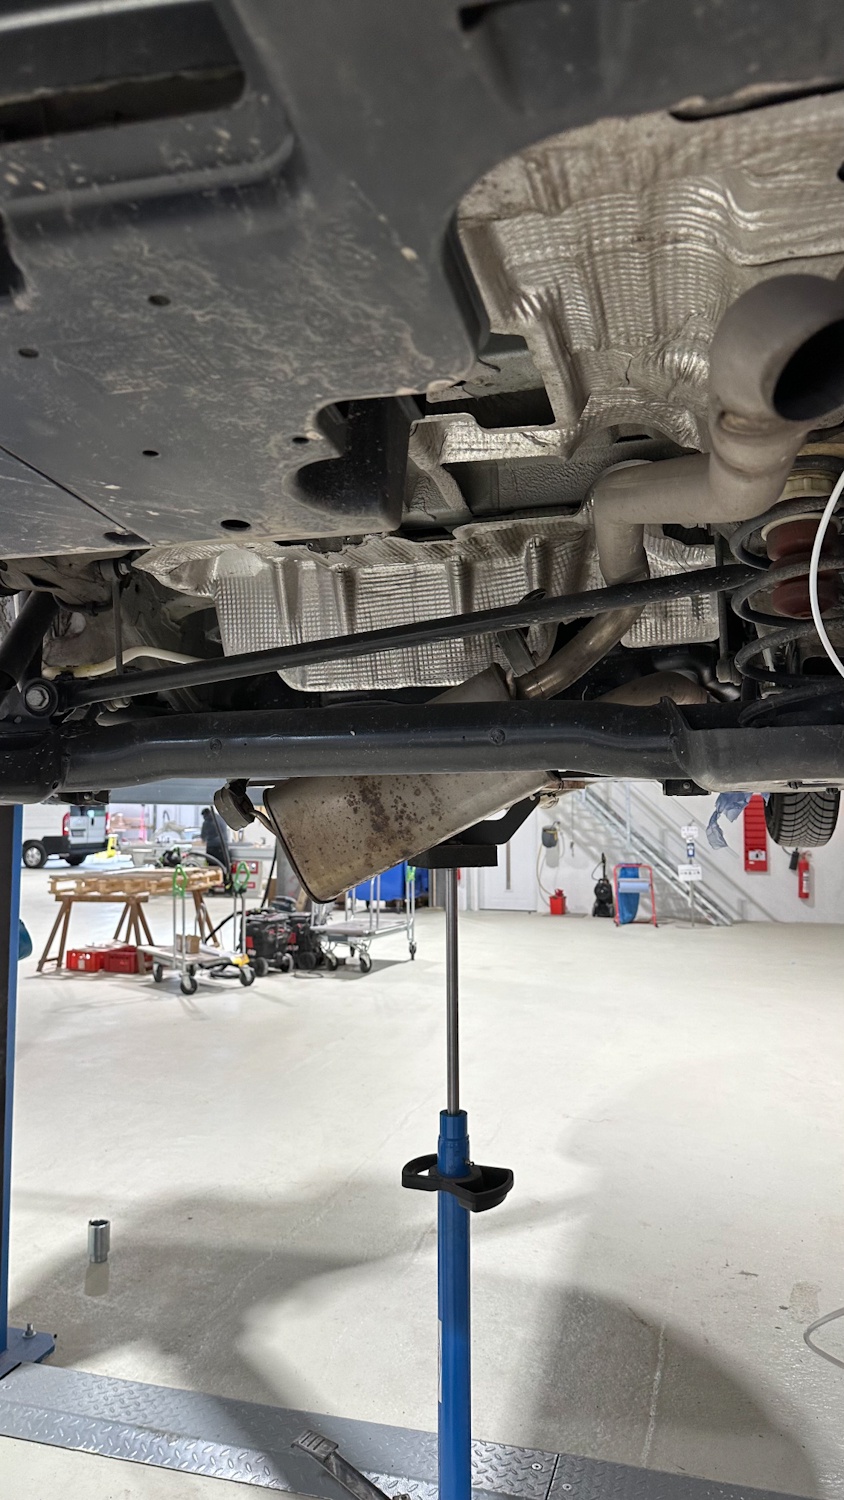
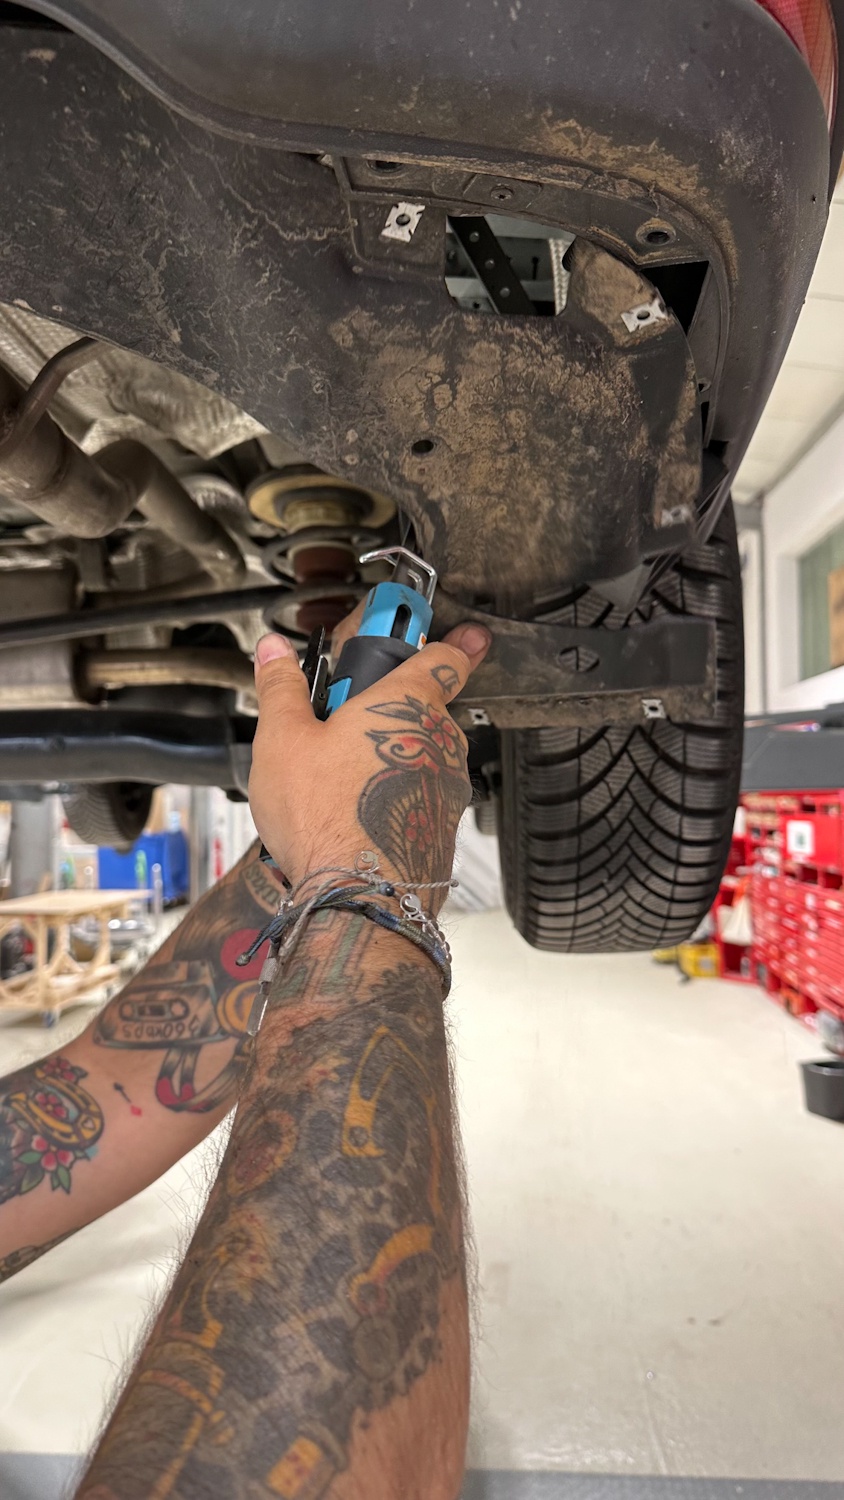
Before you can start with the actual installation, you first have to remove the cladding from the underbody of the Caddy.
Since the Caddy V is completely covered on the underbody, it is necessary to loosen these at the points with a large ratchet and remove them completely first. In order to supply the stove with diesel, a tank extractor must be inserted at the underfloor diesel tank. To do this, the entire tank must be lowered a good distance.
Unfortunately, on the Caddy V the tank is enclosed in the exhaust system, which means that you have to loosen the entire exhaust system once and install the tank extractor.
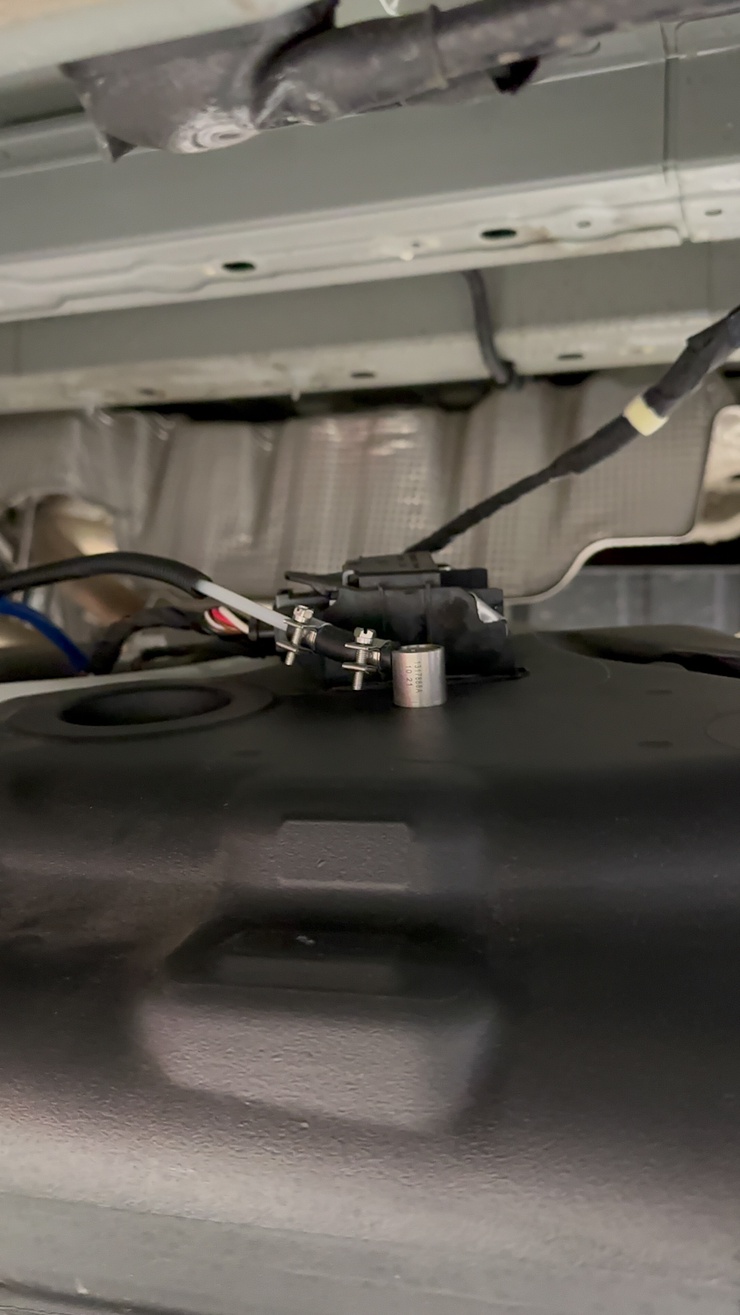
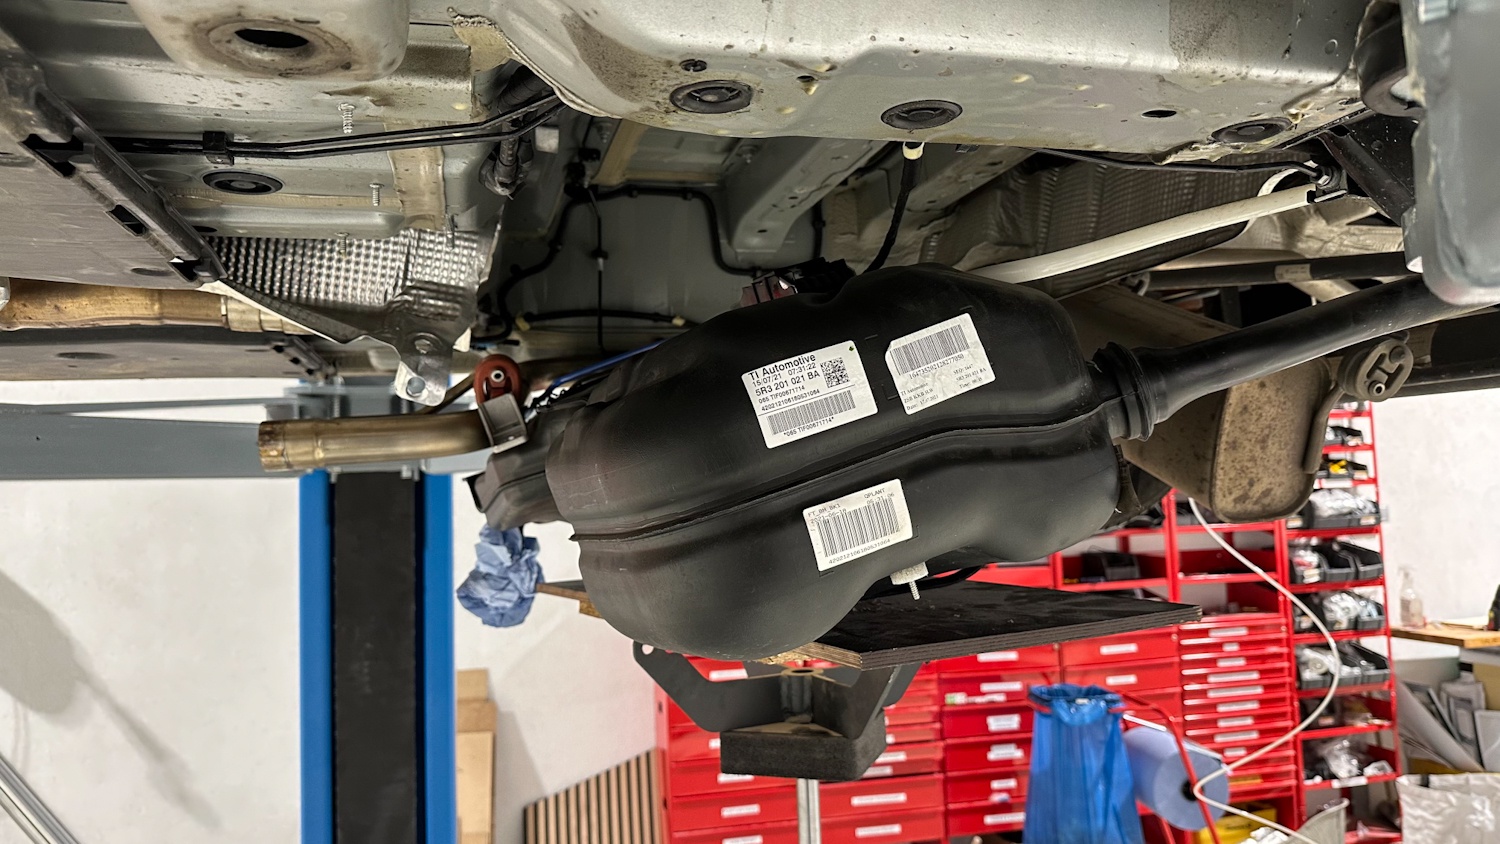
tank extractor
Before lowering the tank, it is best to remove the rear right wheel and the wheel housing cover and make sure that the line to the tank nozzle is not damaged or broken when draining.
Remember to disconnect the lines at the tank sender unit before draining. We used a transmission jack to drain the tank.
Once the tank is drained, the fuel extractor can be used. I used the Webasto Fuel Fix, which has a special drill bit that prevents plastic shavings from falling into the tank. We intentionally didn't build the fuel pickup into the tank's extraction unit, because if the unit ever needs to be replaced or the fuel pickup no longer works, the parts are not dependent on each other.
We drilled a hole on the upper side of the tank, shortened the fuel standpipe to the correct length and fastened it with the screws on the fuel standpipe.
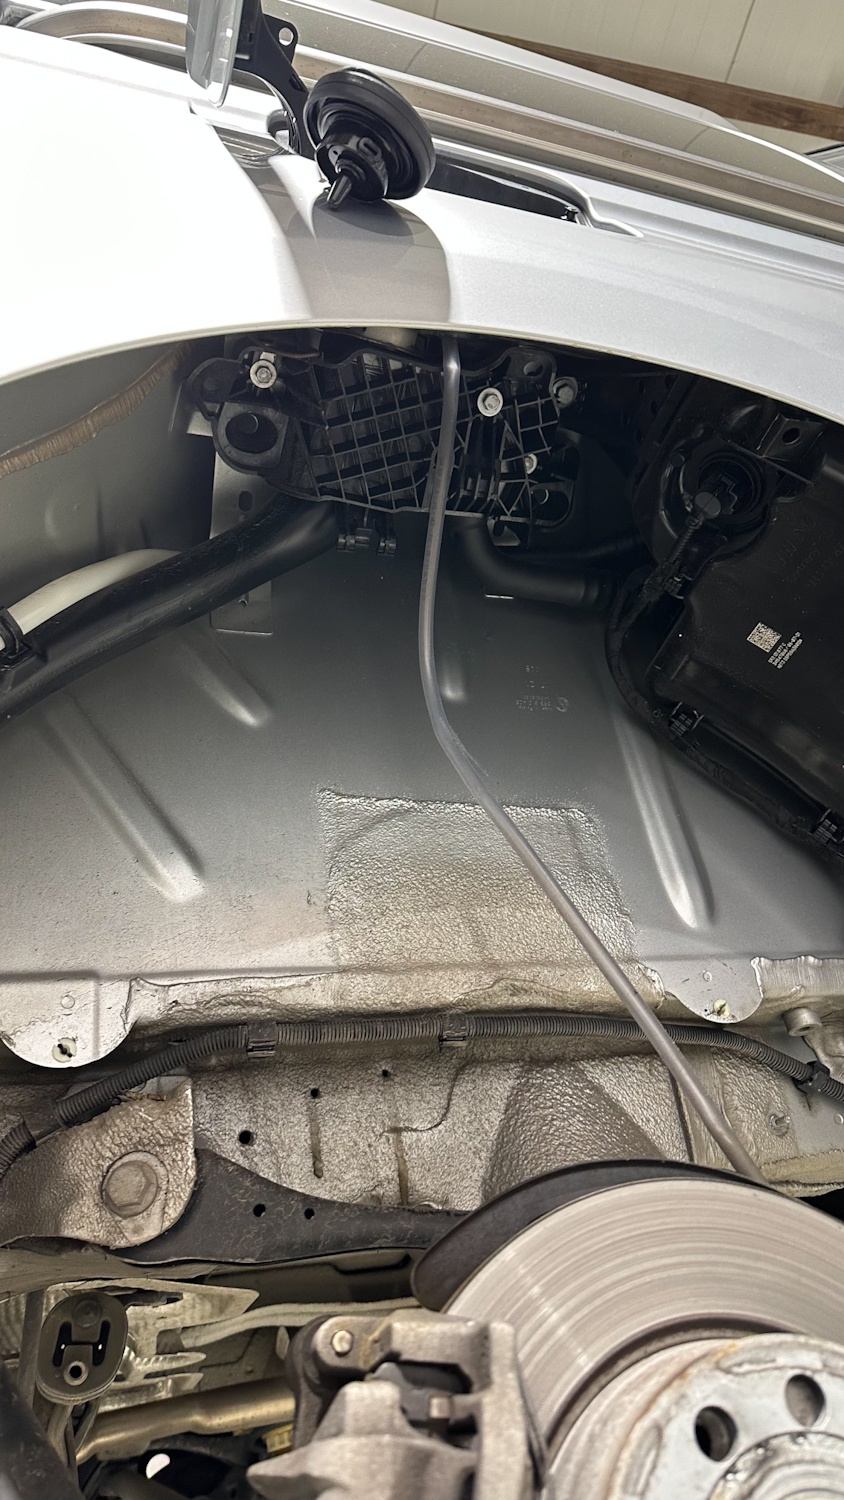
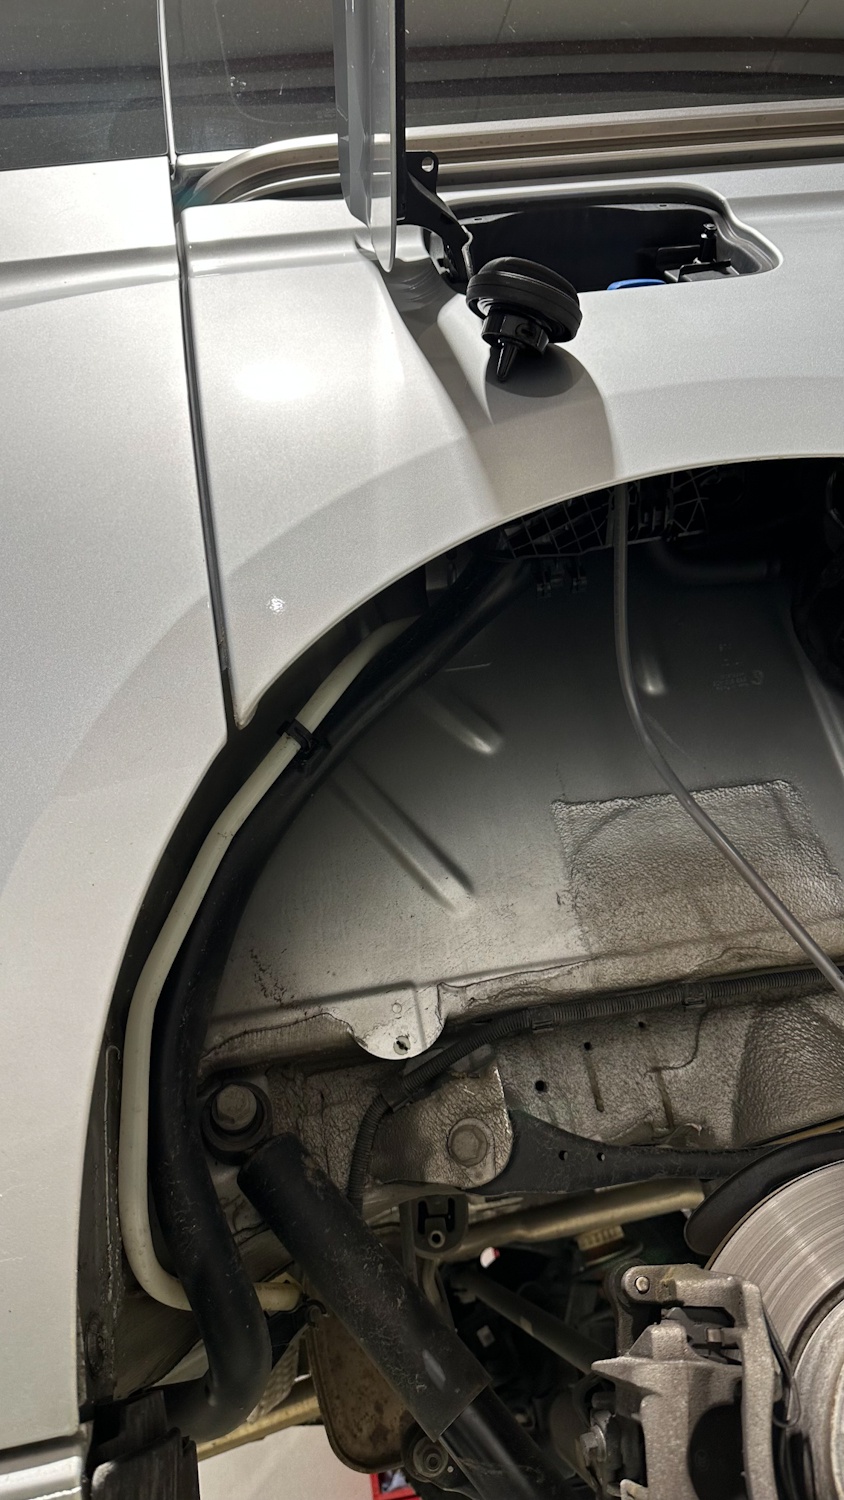
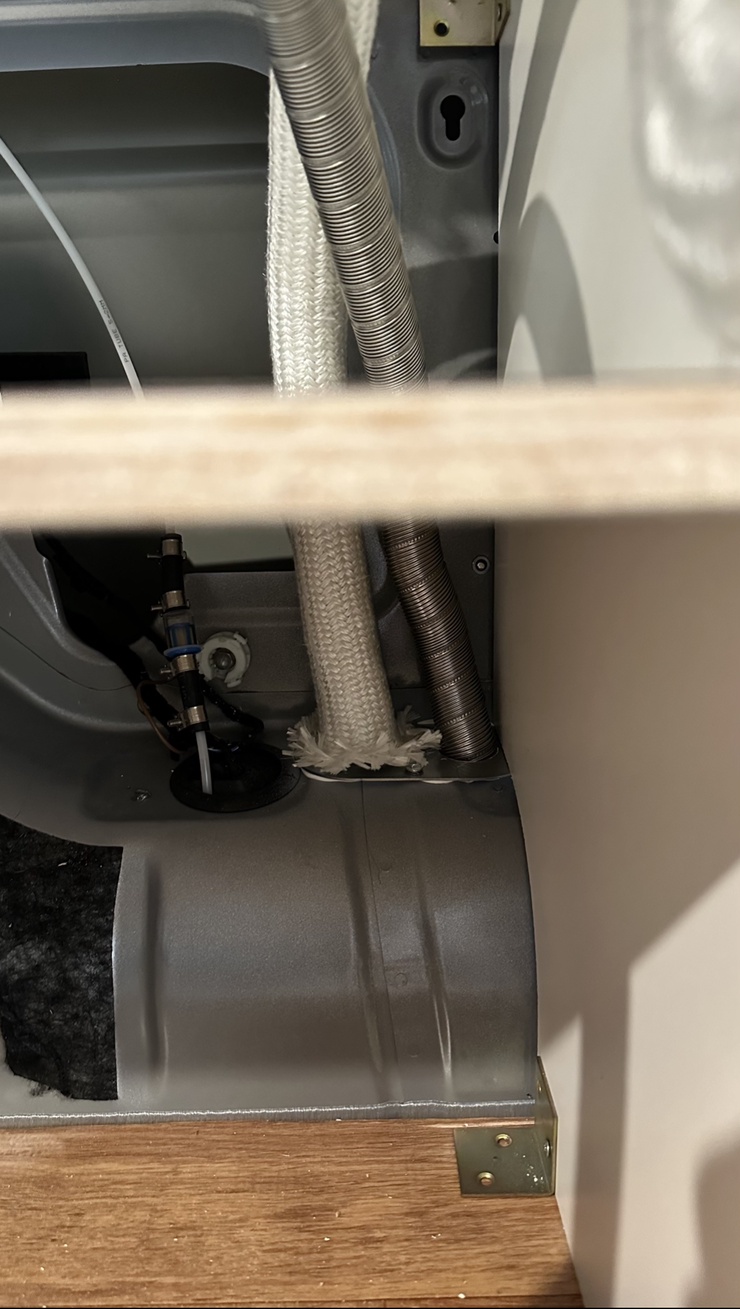
We then connected the diesel hose to the fuel standpipe and coated it with a corrugated hose. To install the hose we used the already existing clips and made sure that the hose was installed under the heat shield.
Since the diesel stove in my Caddy was installed on the right rear, we have also placed the diesel line there. Make sure that the hoses are not strongly bent.
We put the diesel line into the back of the vehicle through an already existing rubber grommet and connected the filter there.
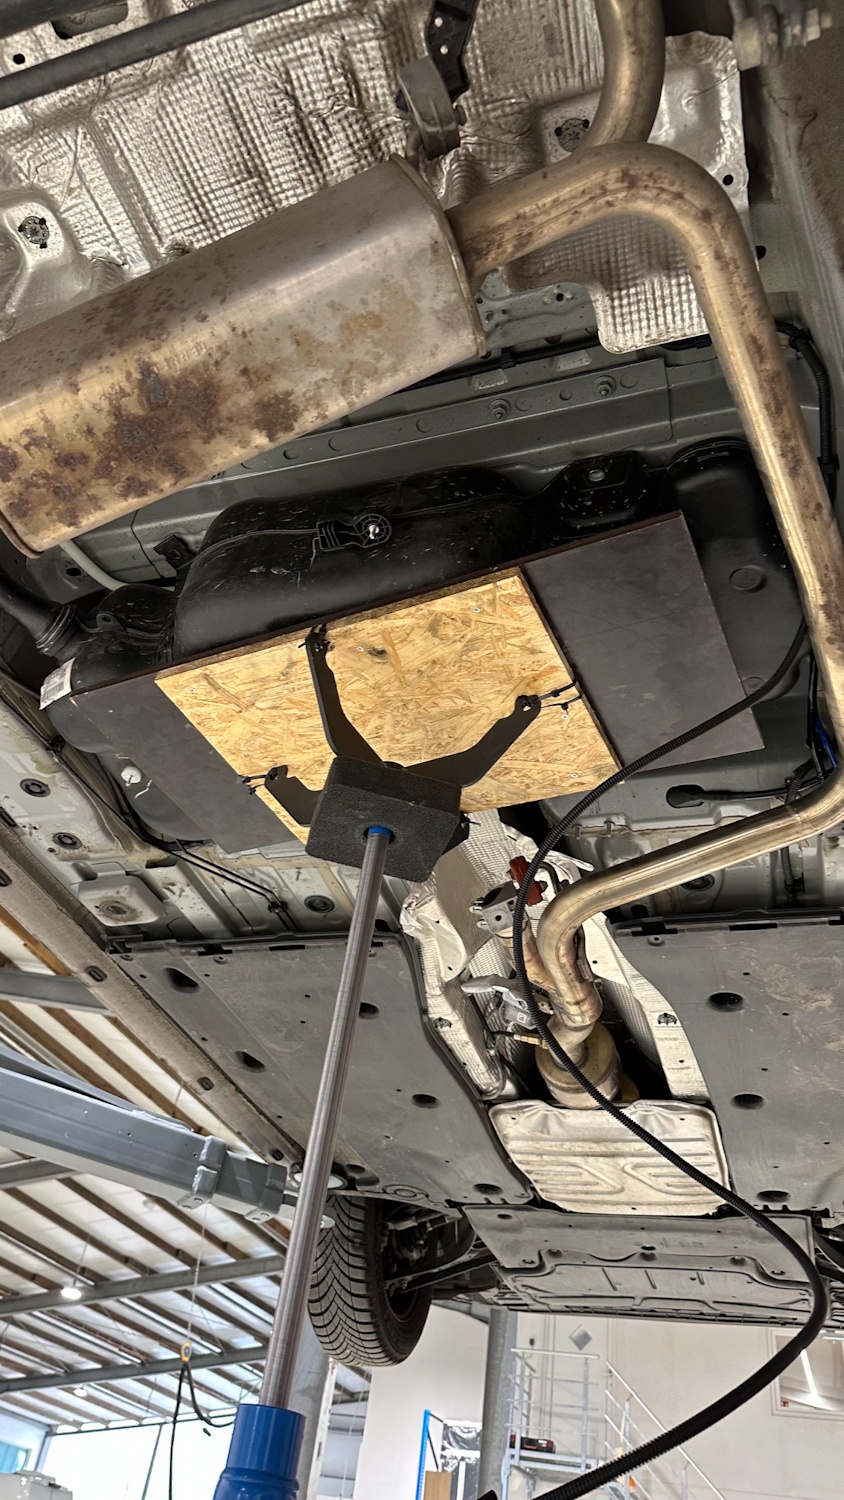
After that, you can move the tank back up using the transmission jack and tighten it.

Combustion connections
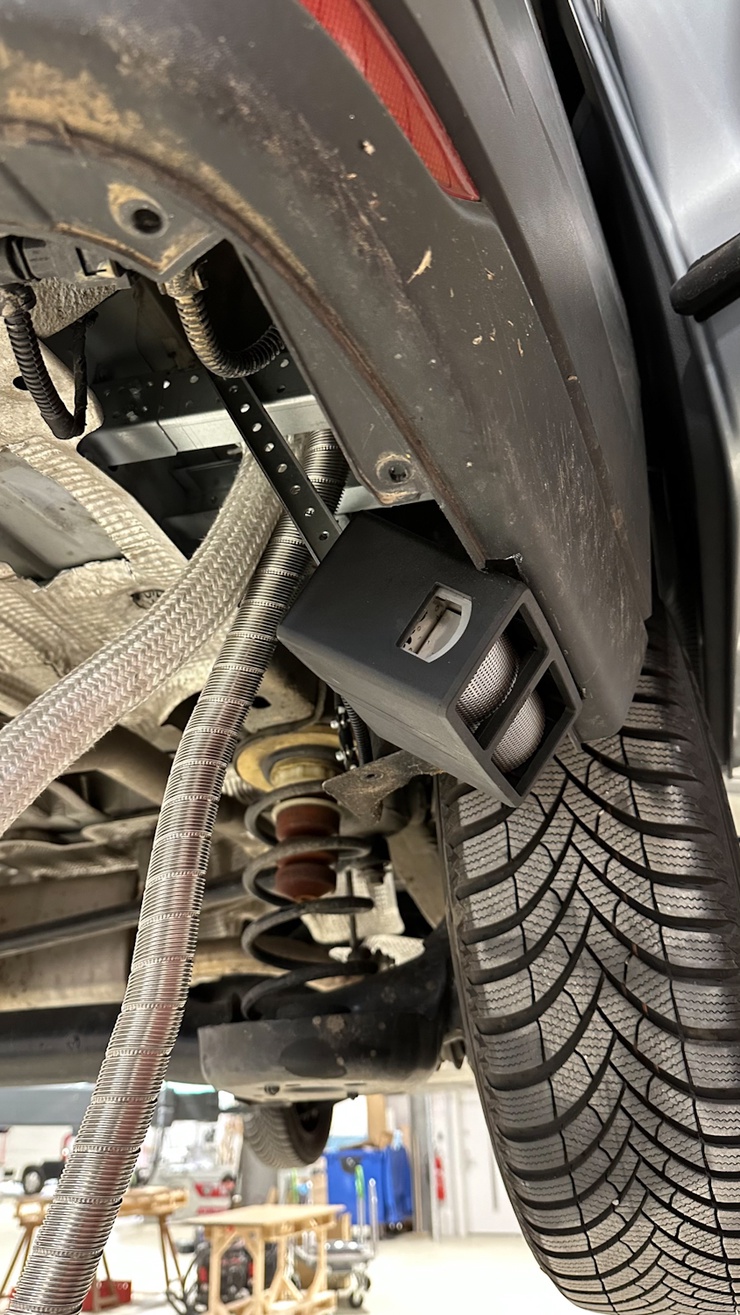
Before we installed the exhaust and inlet pipes, we first looked for a place for the exhaust head. This is not exactly small and must not be installed under the car but only on the side. Basically, the installation instructions state that the exhaust head is to be installed between the wheelbase. However, since the sliding door is directly there in the Caddy, this was not an option in view of the exhaust gases.
After consultation with the company Wallas I decided to install the exhaust head behind the right tire with a distance of 30 cm. The reason why this is not recommended by the company is that at very low temperatures gases can form behind the tire which then ice up.
But since I am not driving in extremely cold areas I decided to place it there.
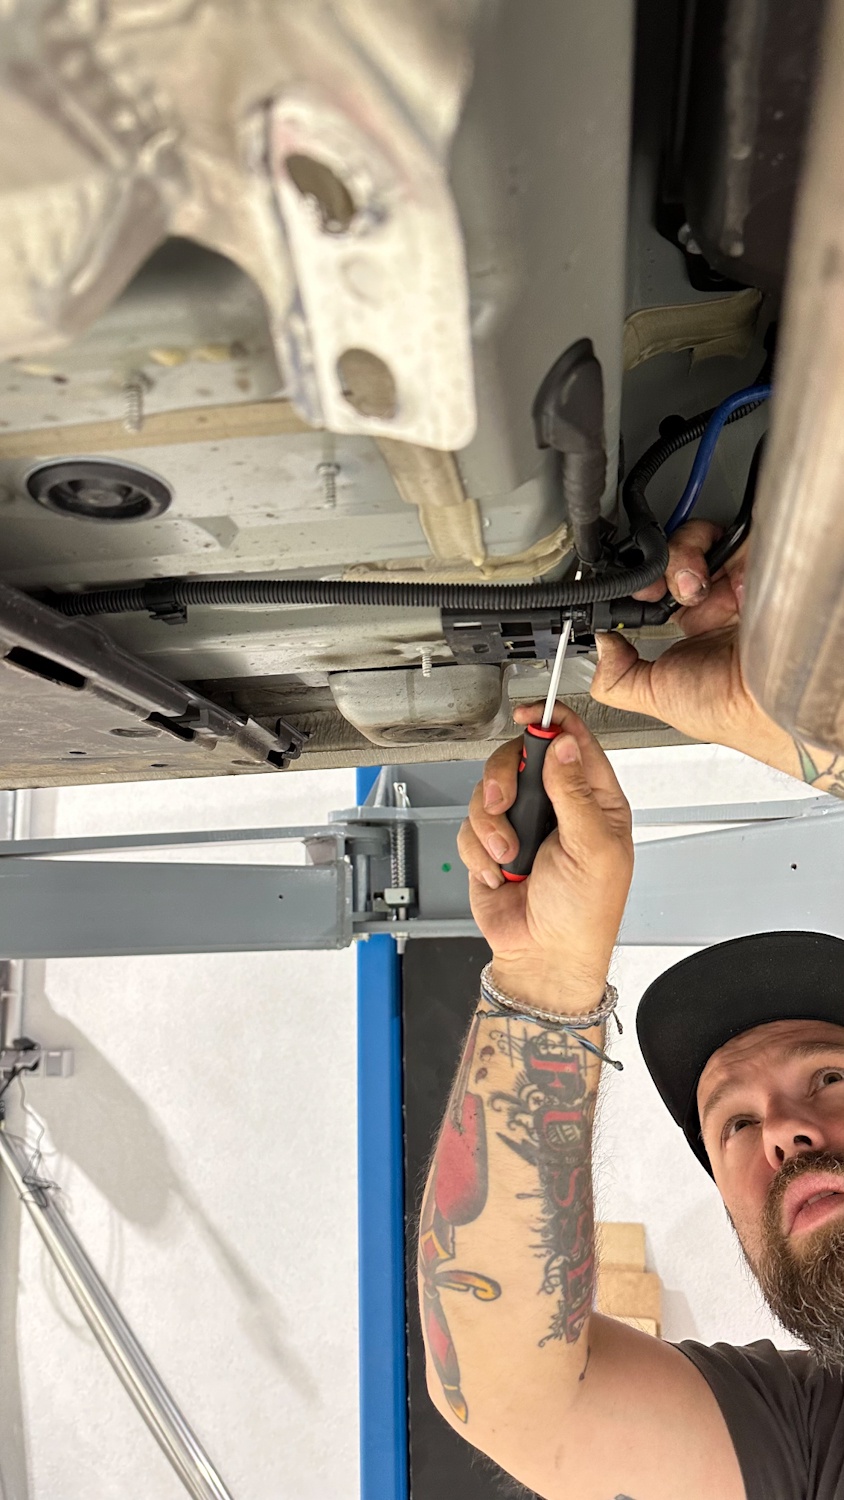
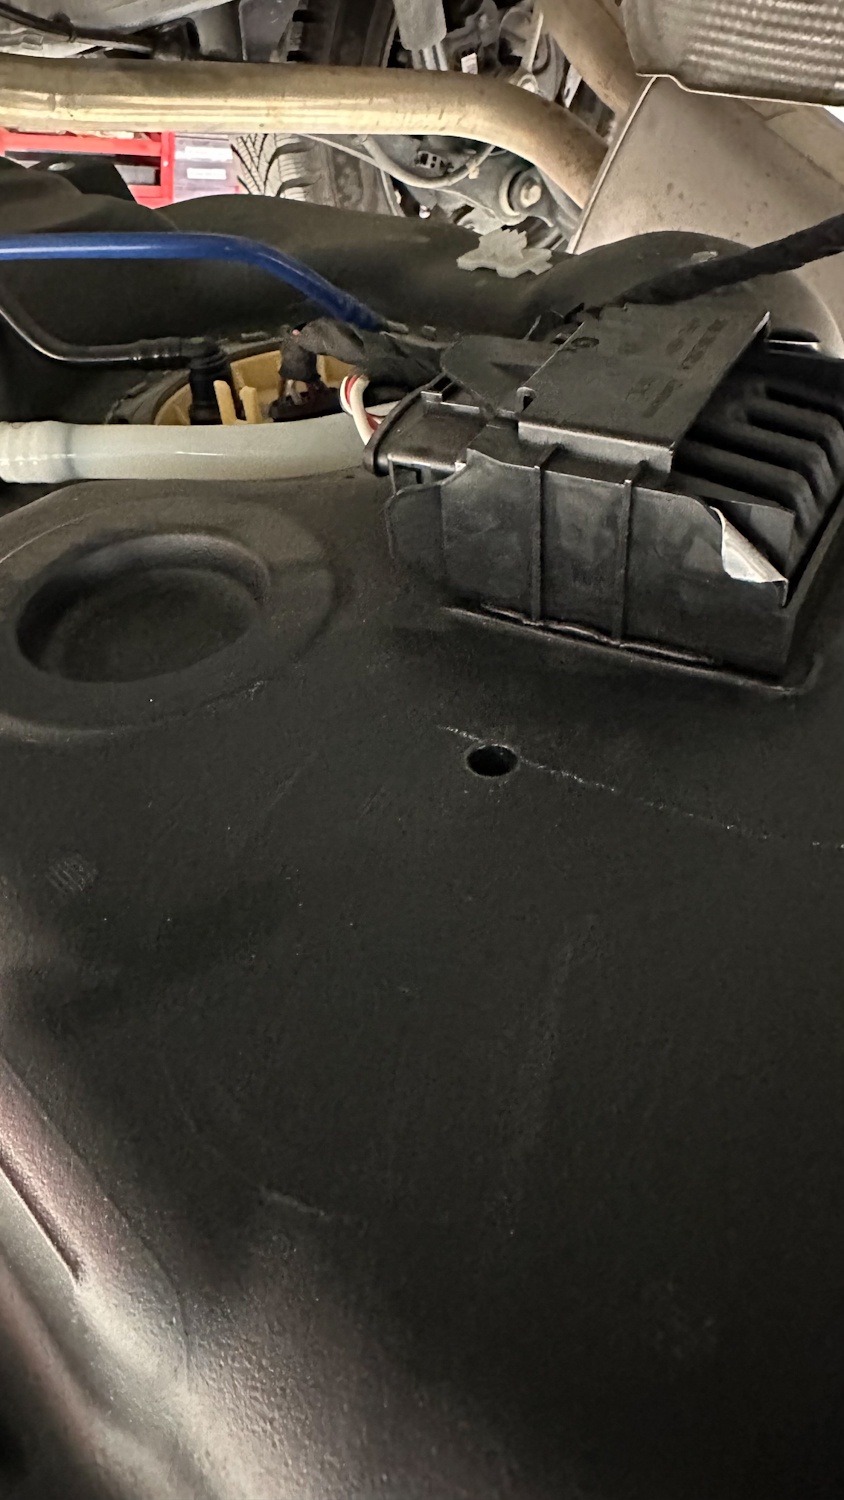
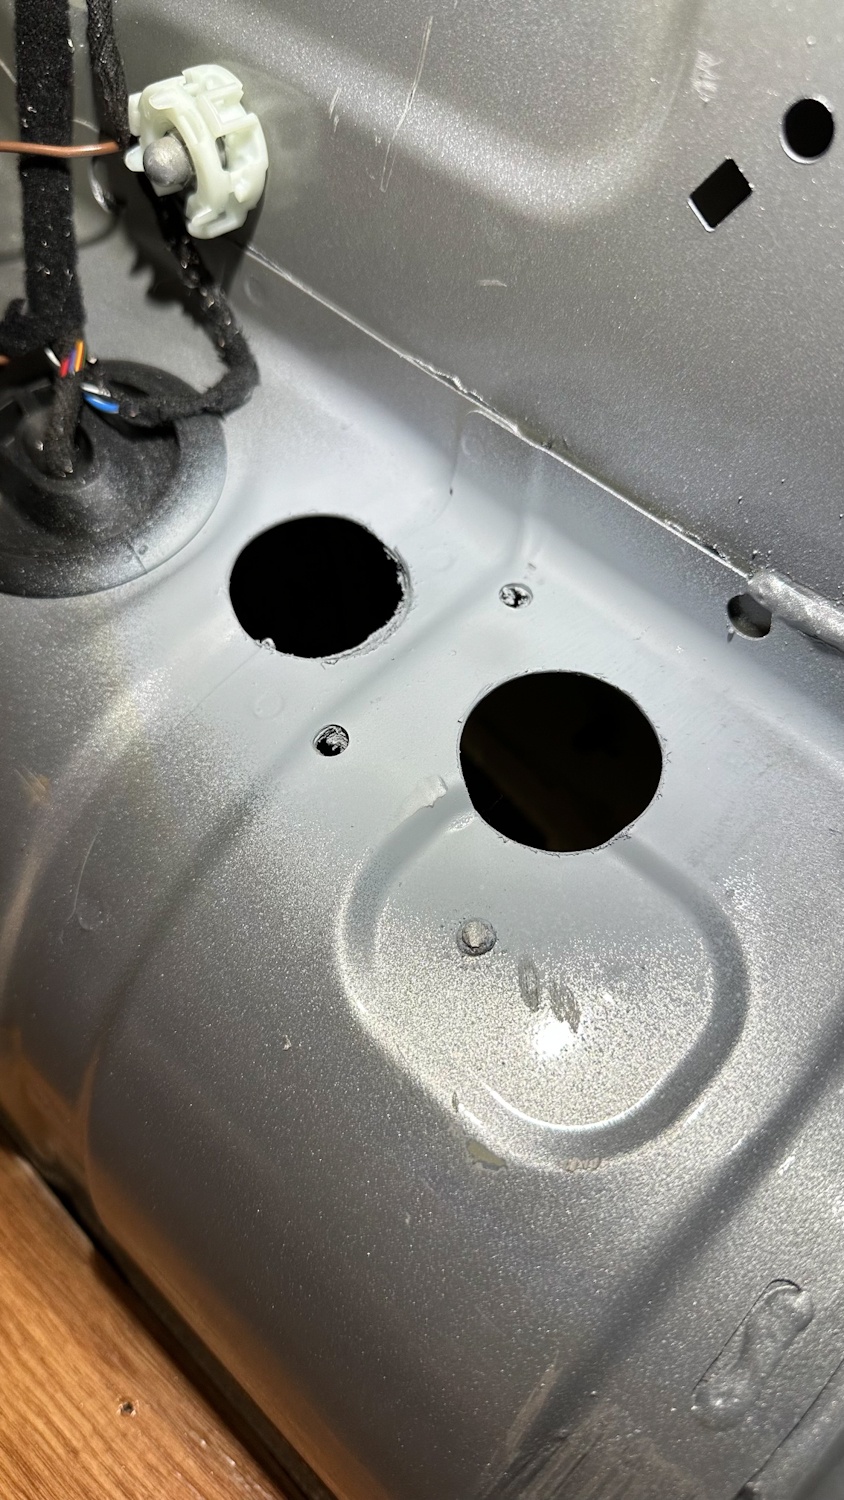
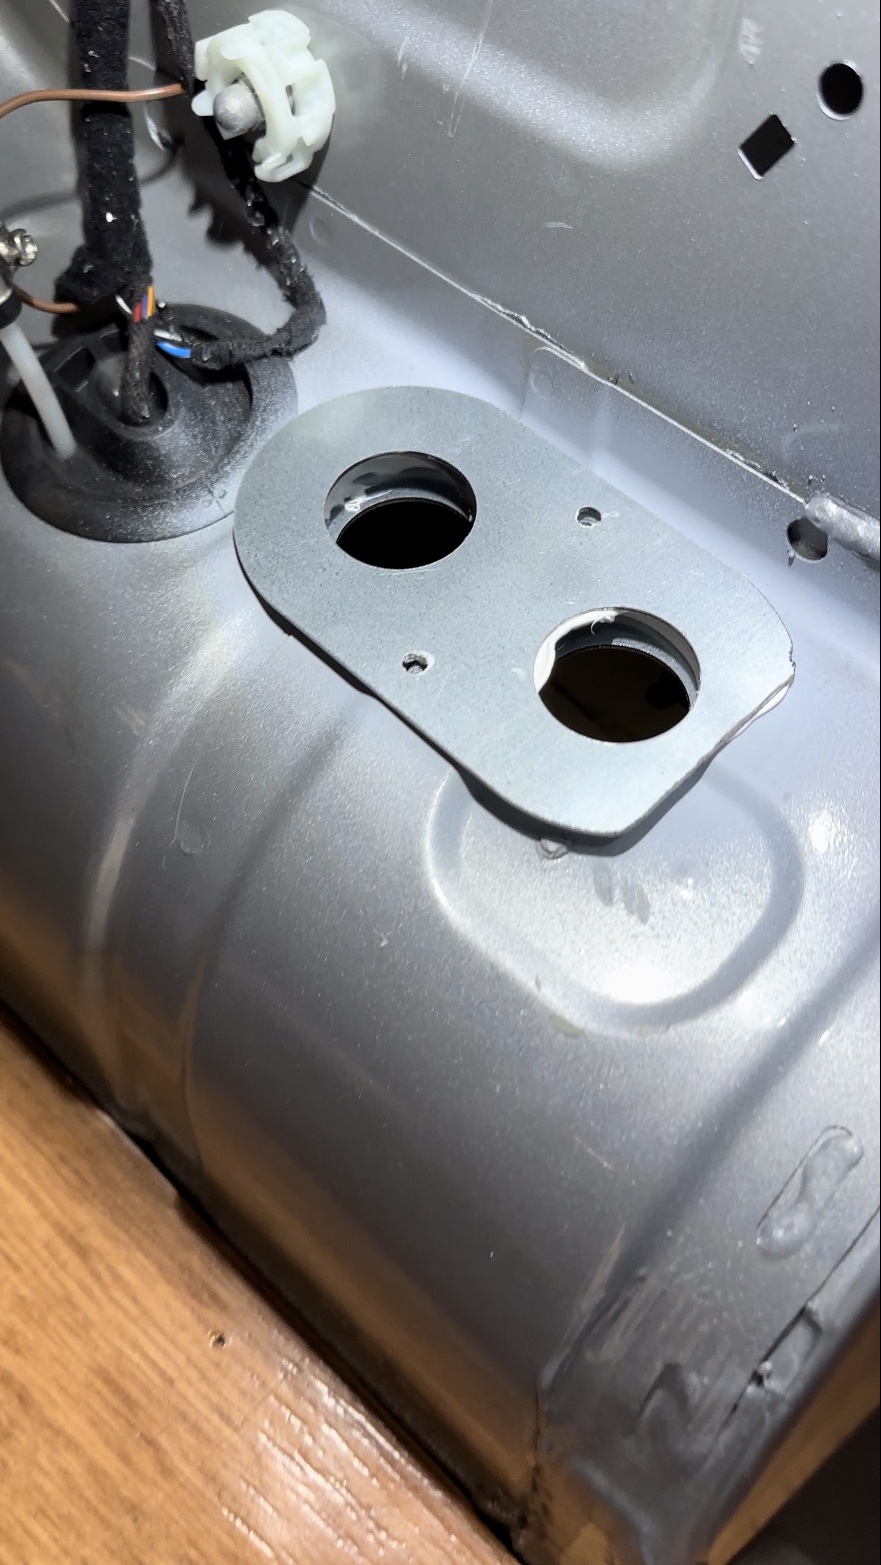
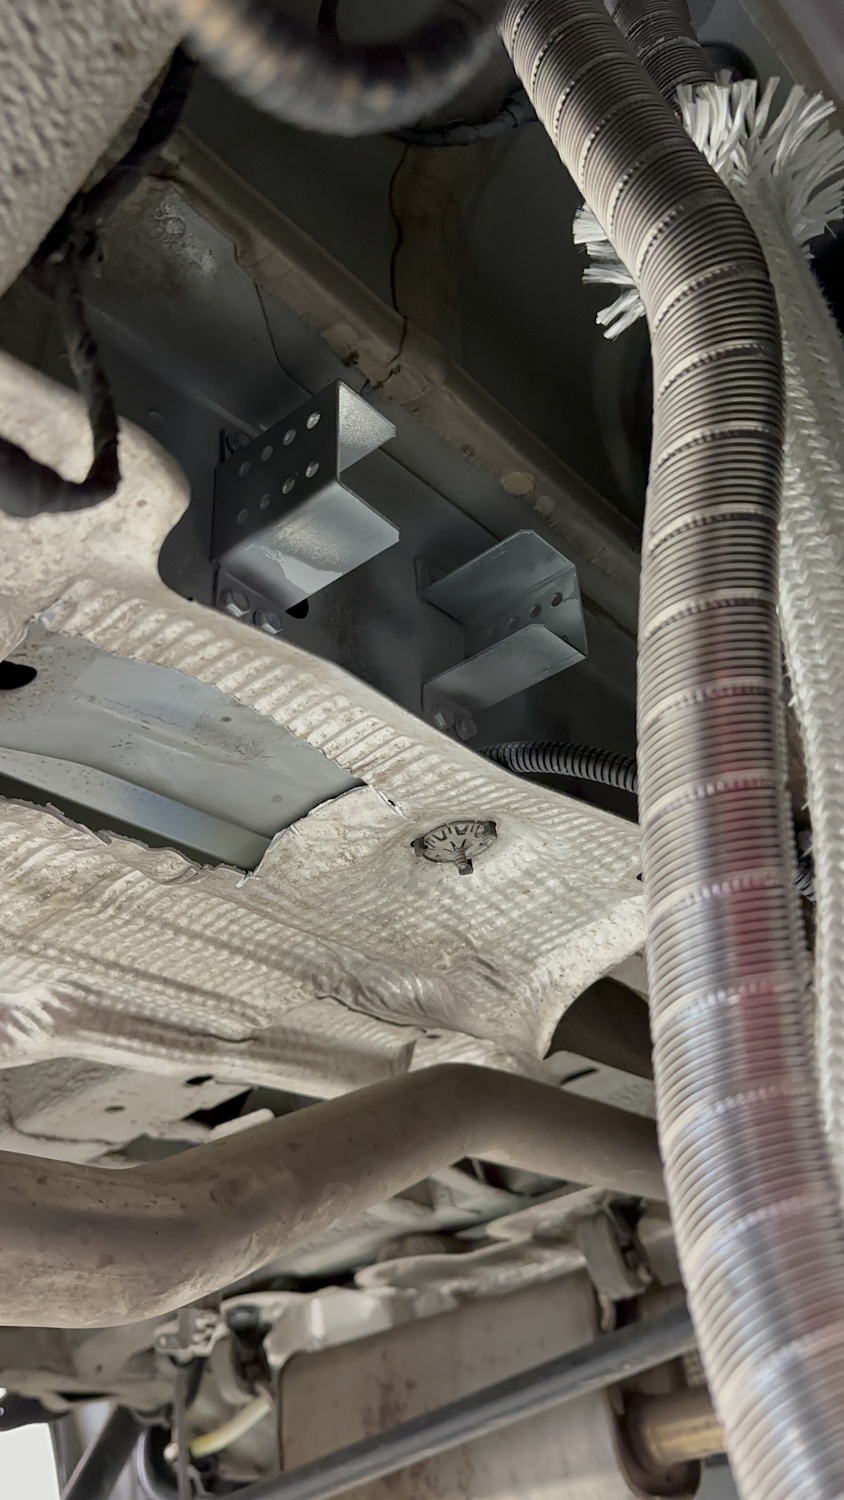
When it was clear where the exhaust head sits we looked at the outlets/inlets of the pipes into/out of the Caddy. In the installation kit of the Wallas there are two mounting plates that give the exact distance of the two pipes. Once we found the right spot, we marked the holes and drilled holes in the body using a 42 drill bit. We treated the holes with rust protection, of course, and then glued on the upper plate with Silka and screwed it to the lower plate and the screws that came with it.

Mounting of the exhaust head
The exhaust head is mounted on a supplied bracket so that it can be mounted under the car sideways, slightly tilted down.
After some back and forth thinking we had then found the right place on the body and screwed the bracket there. Of course, everything again sealed with rust protection.
We have removed part of the bumper below, so that the head fits in nicely.
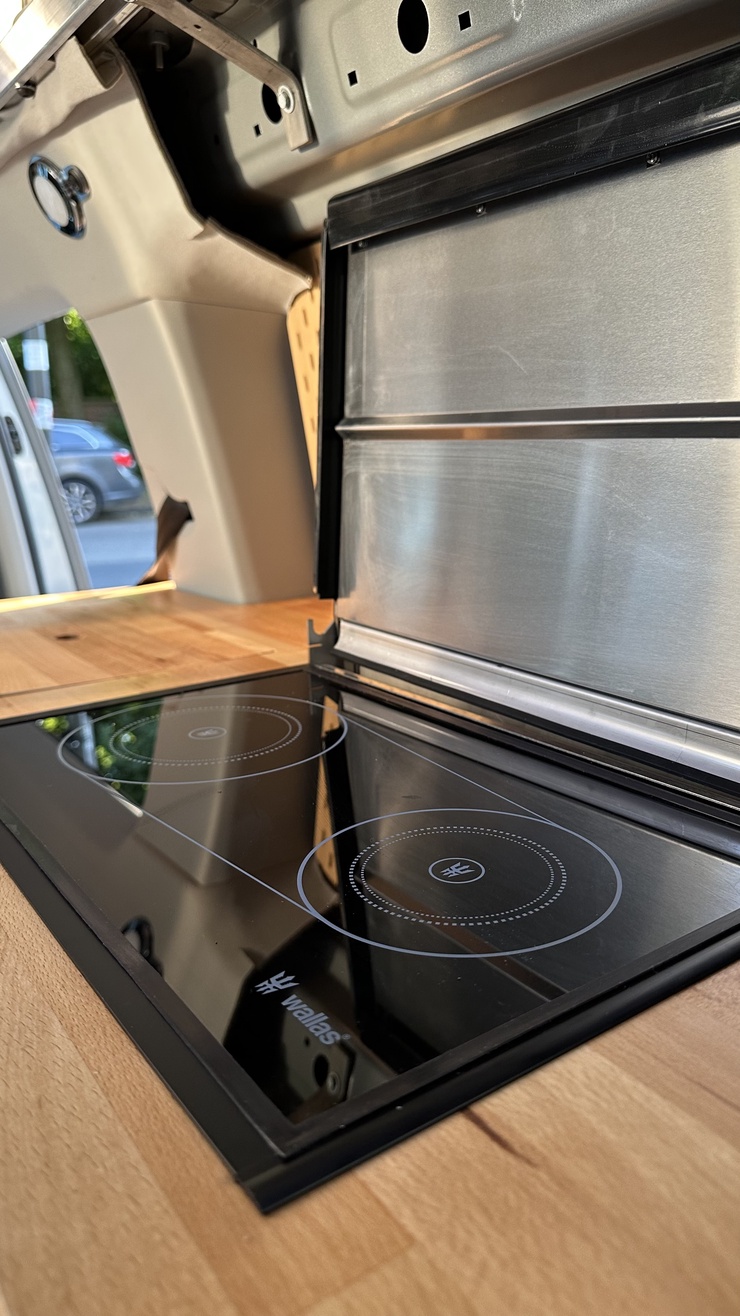
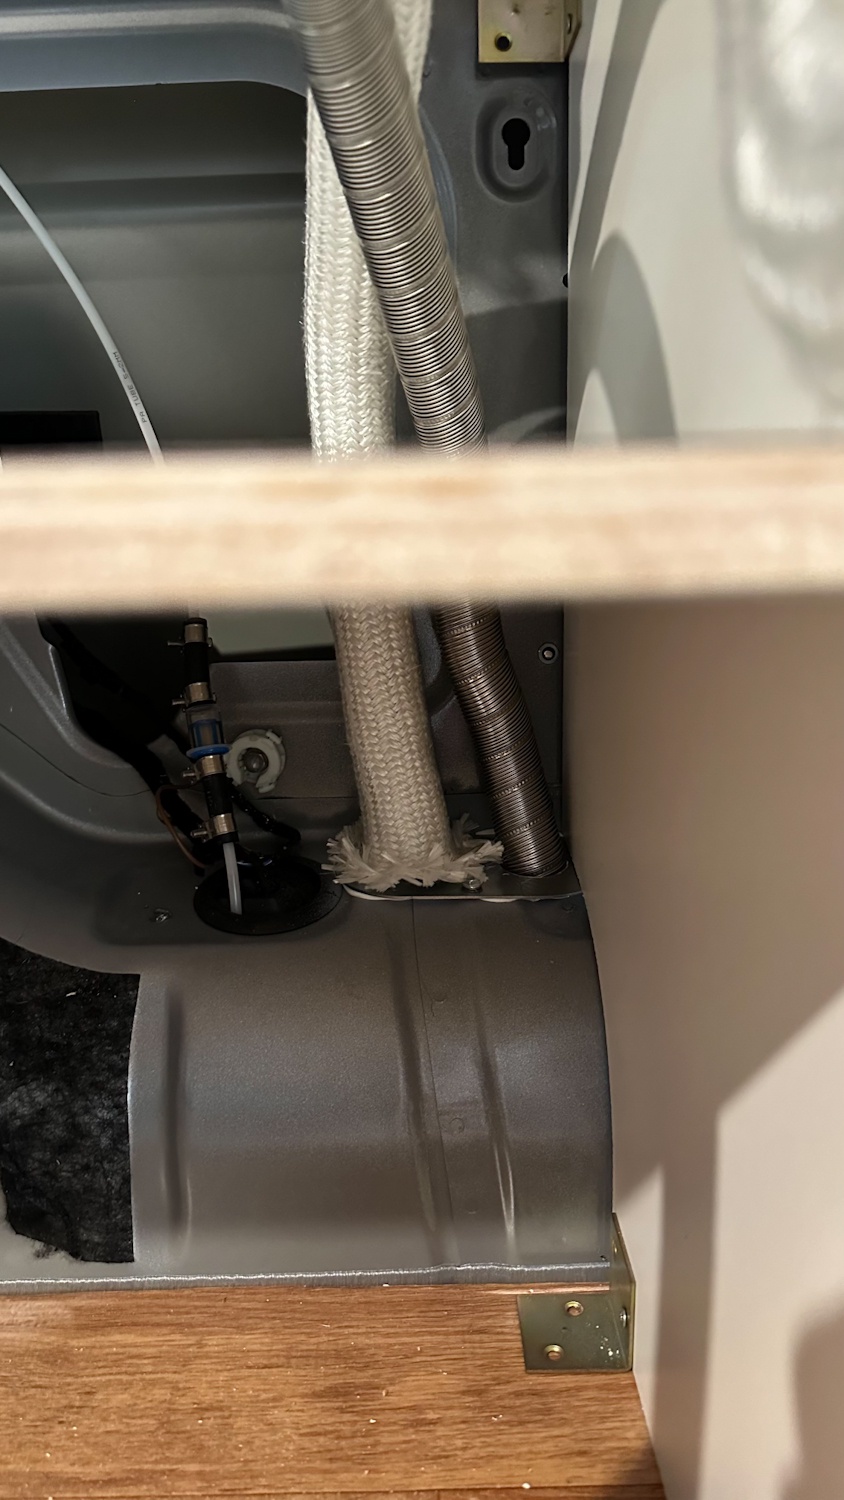
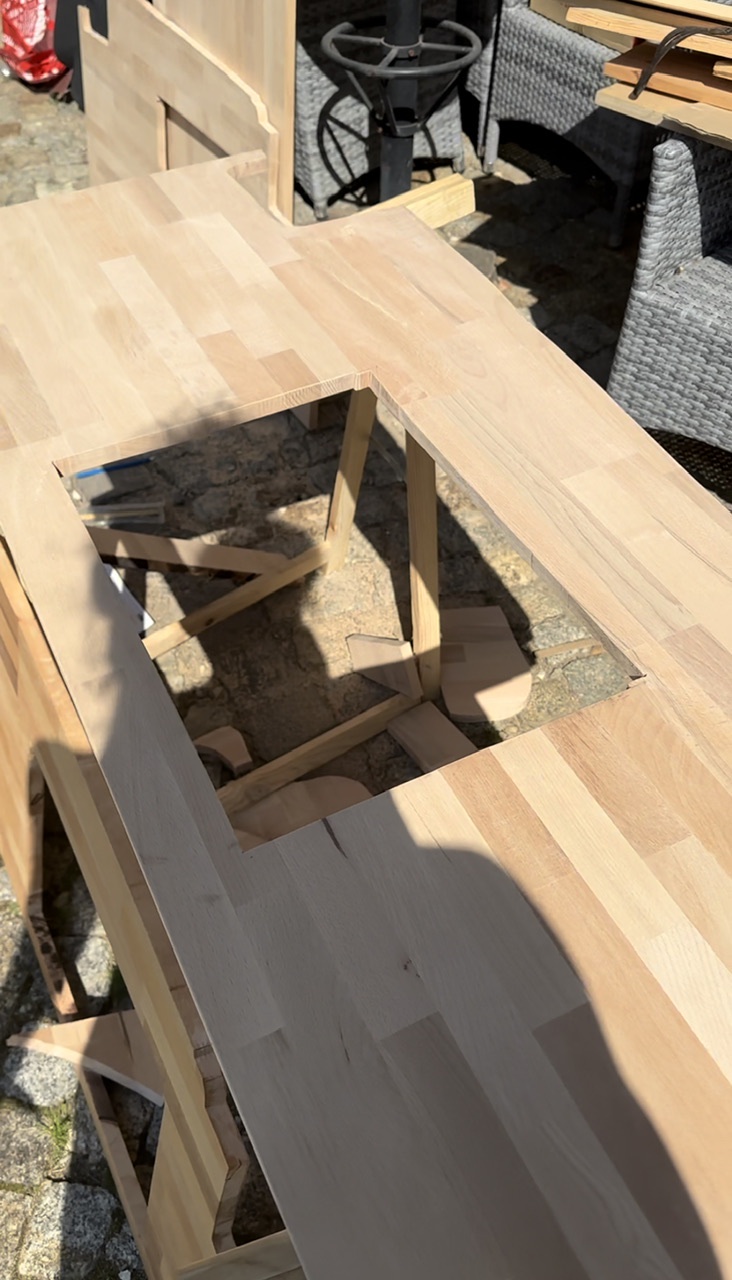
I had already integrated the Wallas in the almost finished kitchen carcass. For this I sawed, according to the exact dimensions in the instructions, a hole and let the Wallas there. The attachment is very easy due to the supplied set. A rail is connected to the Wallas which then presses the Wallas from below to the worktop at two points.
When installing the Wallas in such a small car, you should make sure that you can open the lid completely and that it locks into place at the back. So that the fan works correctly.
Connection of the Wallas
Fuel:
First, the diesel line was connected to the diesel filter to provide the necessary combustion fuel.
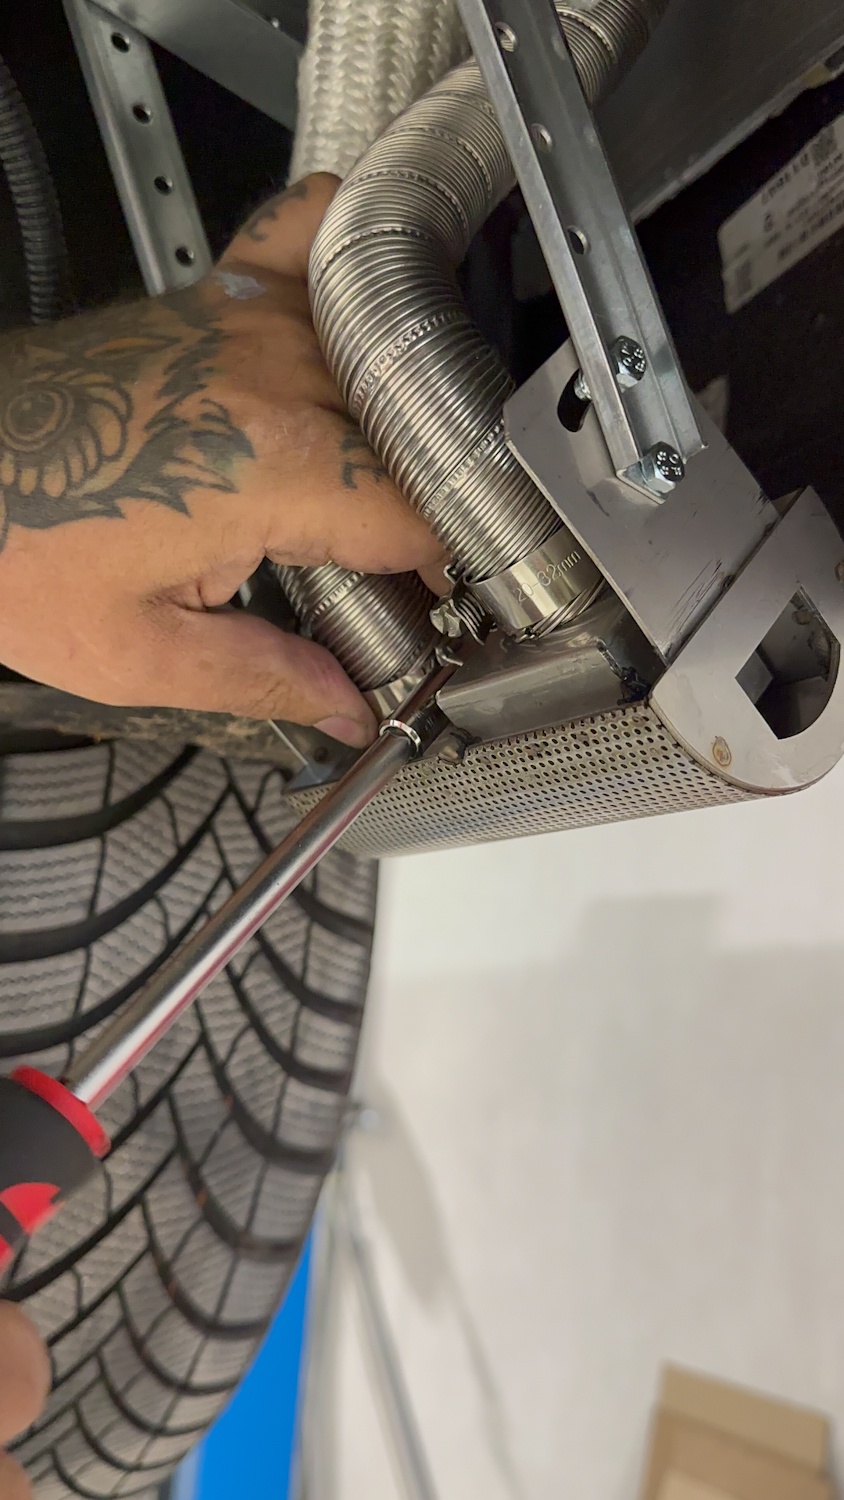
Supply air/exhaust:
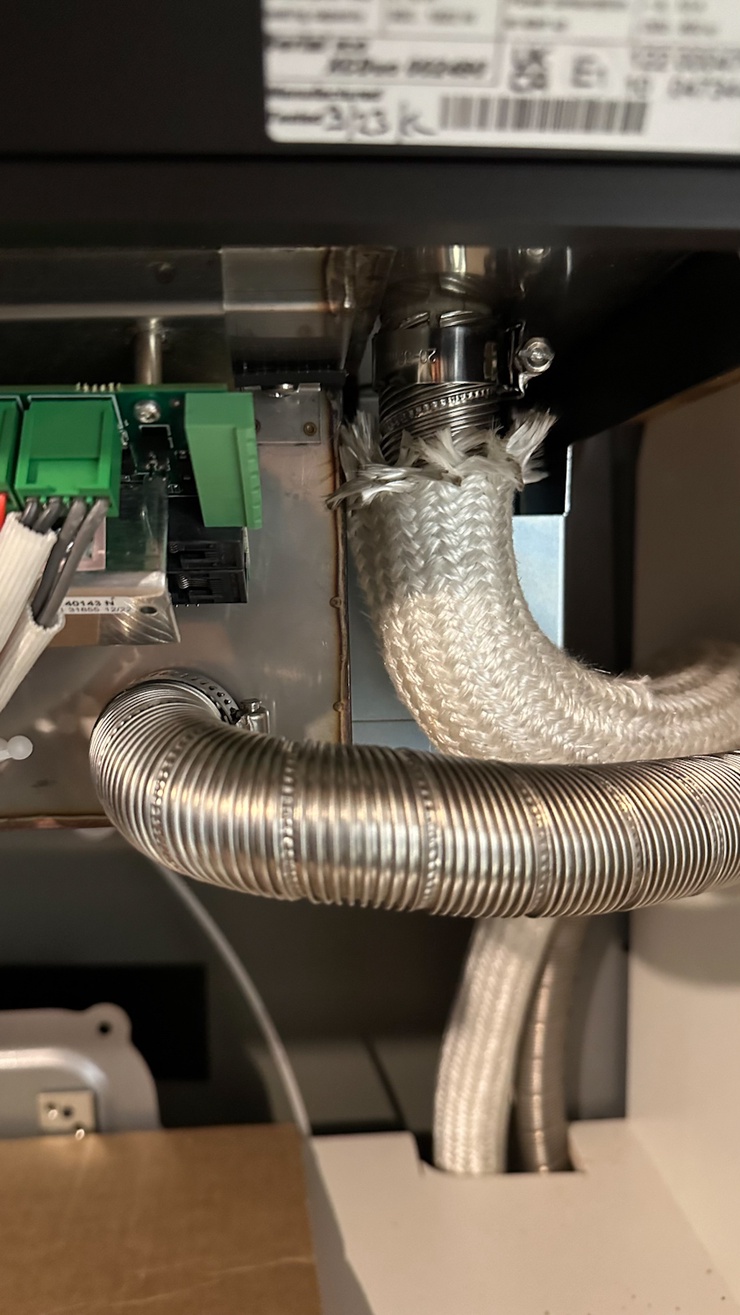
Both pipes leading up from the exhaust head were connected to the Wallas. The exhaust hose gets very warm from the combustion which is why it is wrapped with a heat shield (supplied). Both metal pipes were cut in at the top and secured to the correct connections with hose clamps.
Power:
From the power setup behind my driver's seat, I ran a positive wire to the wallas in the back, which was of course secured with a fuse. Ground we took from an already existing point on the body. The plugs for the control panel as well as for the power connection are then "plug and play".
EXPERIENCE WITH Wallas XC Duo
I have now installed the stove for a few months and am really thrilled. I have been able to use it for heating as well as for cooking.
I have summarized my experiences for you here:
Cooking:
The only "disadvantage" I see in the Wallas XC Duo is that it takes about 5 min to heat up the plate. This is of course much faster with the gas stoves. For me, however, this is not a problem, because I usually have something to cut vegetables or anything else anyway and during that time the stove plate can heat up properly.
For me it is no problem to cook in the Caddy and many of the community have expressed their concerns about the smells. Now of course I have the advantage that I have a pop-up roof and can therefore simply open the top of the tent wall and you also get a good draft. So far I have not had any cooking smells afterwards in the car and I am really very sensitive to odors.
For me, the biggest plus is that I am not dependent on the weather. Especially in windy weather and at low temperatures, most gas stoves really struggle and a large stove top with gas unfortunately also entails a large gas bottle, which you then also have to stow (safely) in the caddy. Open fire I find in such a small camper somehow scary :) and by installing the Wallas you need of course also no gas test at the TÜV.
Heating:
For me, the Wallas scores above all with the fact that it serves both as a hotplate and as a space heater. The consumption is almost identical to that of a space heater and it can run all night without problems. If you want to use the stove as a heater, you switch to heating mode and fold down the cover plate. The stove top is then heated and the fan blows the air over the stove top which is then heated. This creates a cozy warmth in a short time. Even with me with pop-up roof is no problem, because I have in the rear two flaps to enter the pop-up roof. In cold nights I simply leave one side open and so it is also cozy warm in the pop-up roof.
Because the stove is installed at waist height, the warm air also flows into the camper. Since warm air rises, the floor of the camper is cooler than the upper part of the camper. In the Caddy I found the difference is not so noticeable, but have so far only up to 5 degrees camped in it.
Unfortunately, the intensity of the fan can not really be controlled, the function I found quite helpful with a normal parking heater, because you could minimize the noise level somewhat. Once the temperature in the camper is reached, I have the feeling that the outflow of warm air is somewhat reduced.
Volume:
I find the volume similar to a parking heater. With the diesel stove, the pump is in the stove which means that you can also hear a quiet clacking in the Caddy. However, I do not find it particularly disturbing and could also sleep well. In my last Caddy I had the parking heater installed underfloor and still I could hear the diesel pump "clacking" at a similar volume.
As mentioned above, the fan is not adjustable.
The Wallas XC Duo is available for purchase from the distributor Reimo.
- to the store -
Basically, I am so far more than satisfied and celebrate the diesel stove whenever I use it. Unfortunately, he strikes with 1950 € tidy to the bill and the installation has cost me with hall rental including also again 780 euros. Nevertheless, I find that he is just for small campers a real benefit.
Should you have any questions, be it about installation or use do not be afraid to ask me. You can contact me on Instagram or via email.
