Products
First of all, I thought about how much power capacity I needed in the caddy and what exactly I wanted - 230 V connection? Solar?
It was clear to me that I wanted to be able to generate electricity while standing and also be able to charge a laptop with a 230 V connection.
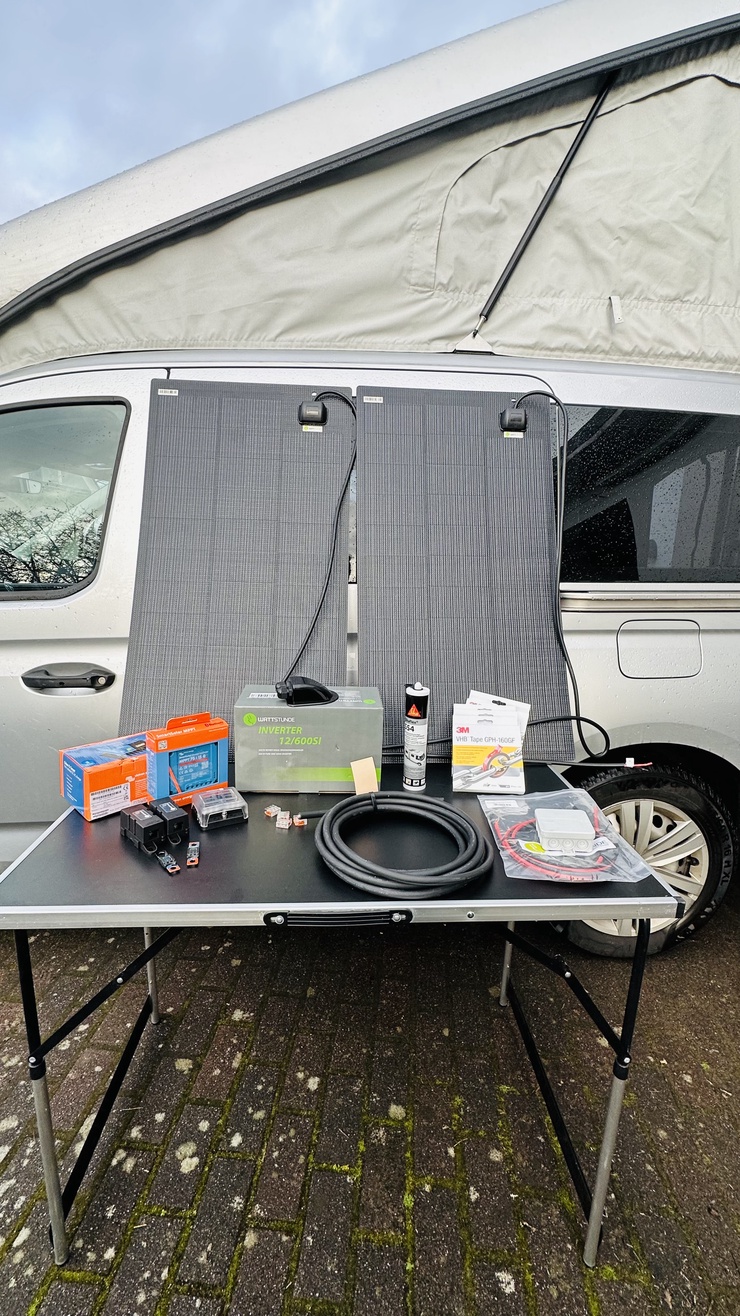
As I wanted to be self-sufficient for a few days, I opted for the under-seat lithium battery with 150 Ah from Wattstunde. I opted for a solar system to charge the battery while standing. As the pop-up roof is not completely straight, it was a complete set with two semi-fixed solar modules with a maximum rated output of 200 watts. To distribute the power and ensure it was sufficiently safe, I chose a circuit distributor from Wattstunde with 12 connections. To be able to charge the battery properly while driving, I opted for a Victron charging booster and to be able to install a 230V connection, I also ordered a voltage converter. In order to secure everything properly, you also need two high-load fuses.
To summarize:
- Under-seat lithium battery with 150 Ah from Wattstunde
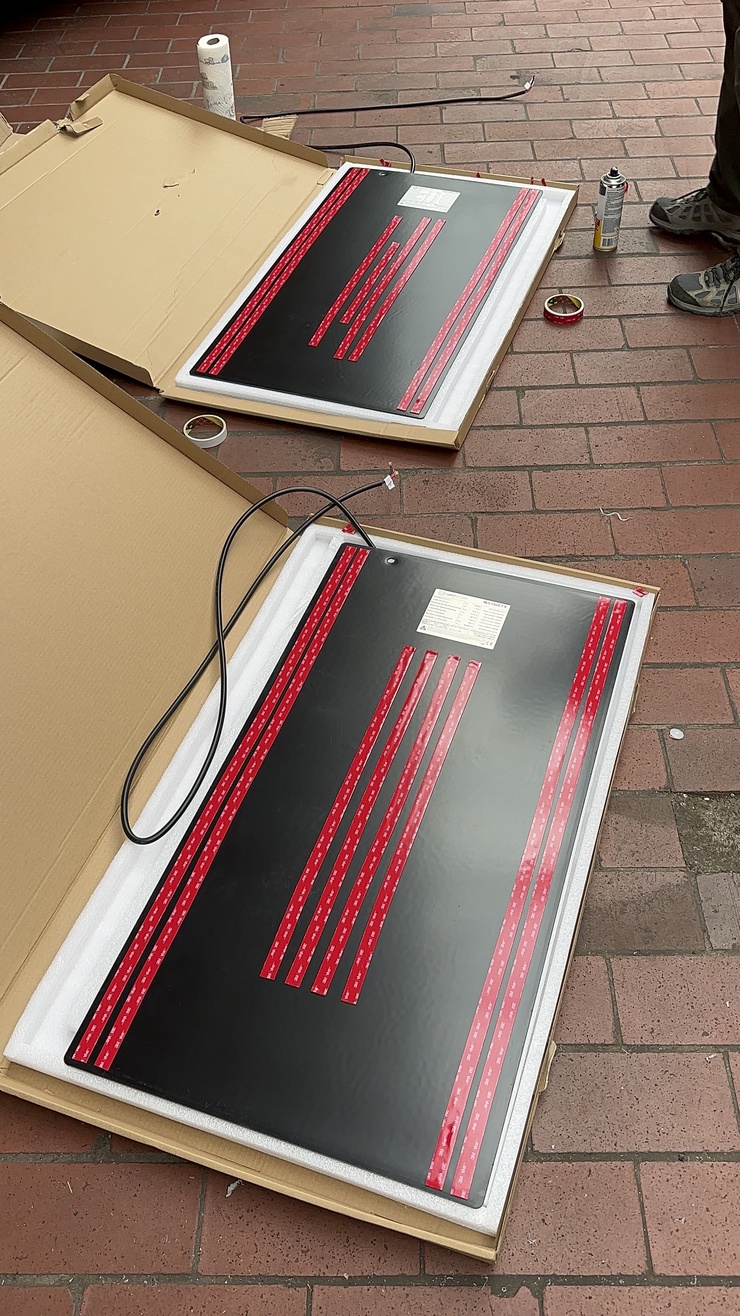
- Complete set with two semi-fixed solar modules
- Circuit distributor from Wattstunde with 12 connections
- Charging booster from Victron
- Two high-load fuses (holder/ fuse)
- 4 meters H07V-K PVC core cable, finely stranded, 16mm²
- heat shrink tubing
- Cable lugs (suitable for the cables)
- Crimping pliers (up to 16mm²)
- Drill (for the roof bushing)
Roof Bushings
We started with the roof duct, because the Sika Flex has to dry for a few hours before the caddy can be moved again.
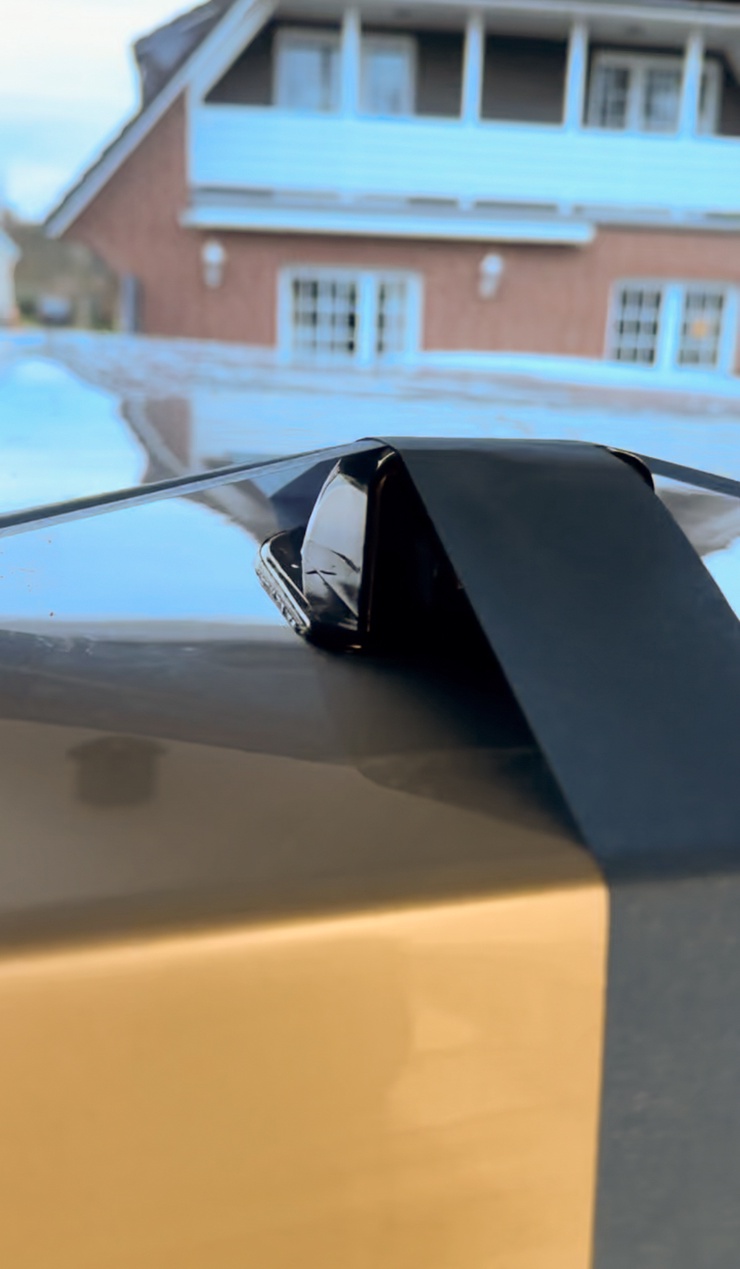
So we first thought about where the solar panels should sit and drilled a hole there. This should be large enough to feed both cables through, but of course not larger than the feed-through.
We then glued the bracket in place with Sika Flex (included in the complete set) and fixed it with adhesive tape.
In principle, you could also glue the solar panels in place at this stage, but I don't recommend this as you can't test them without having installed the system. If they don't work properly for whatever reason, you won't be able to get them off the roof without damaging them because of the adhesive.
I therefore recommend only gluing the panels on after the battery, charging booster and solar controller have been installed.
Remove cladding
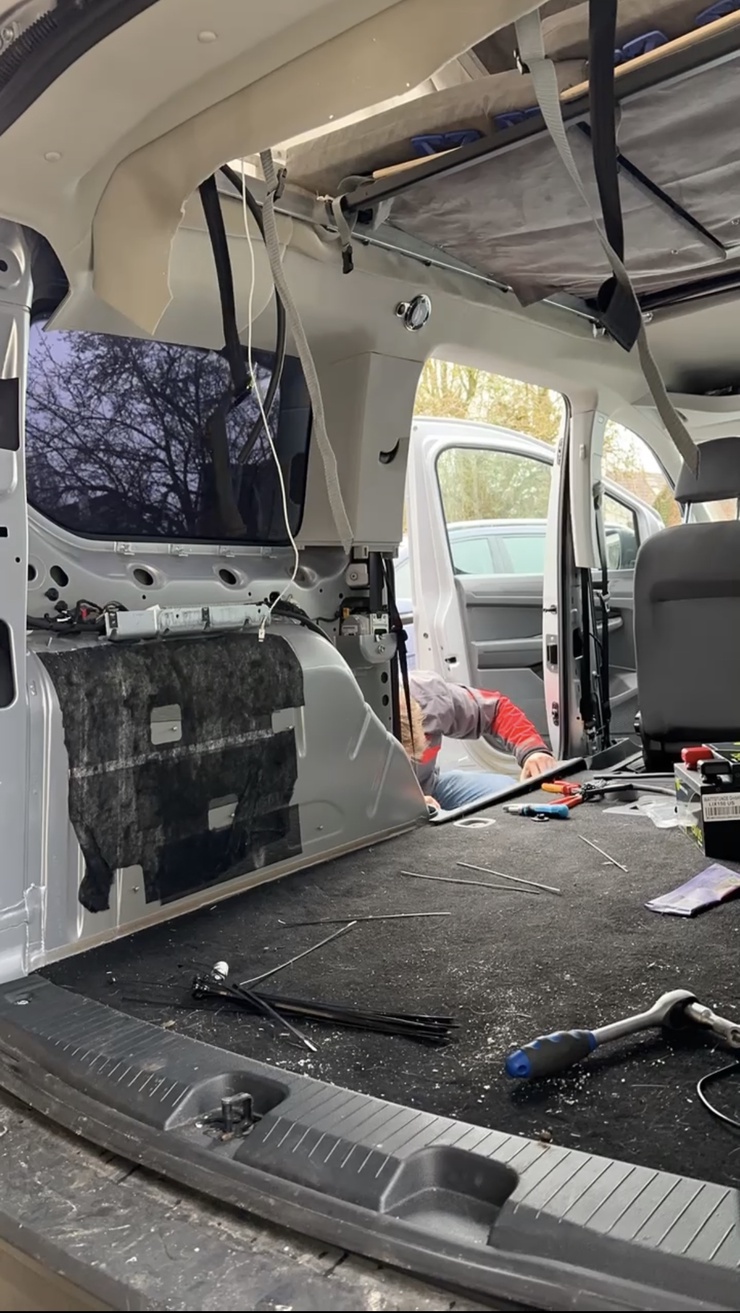
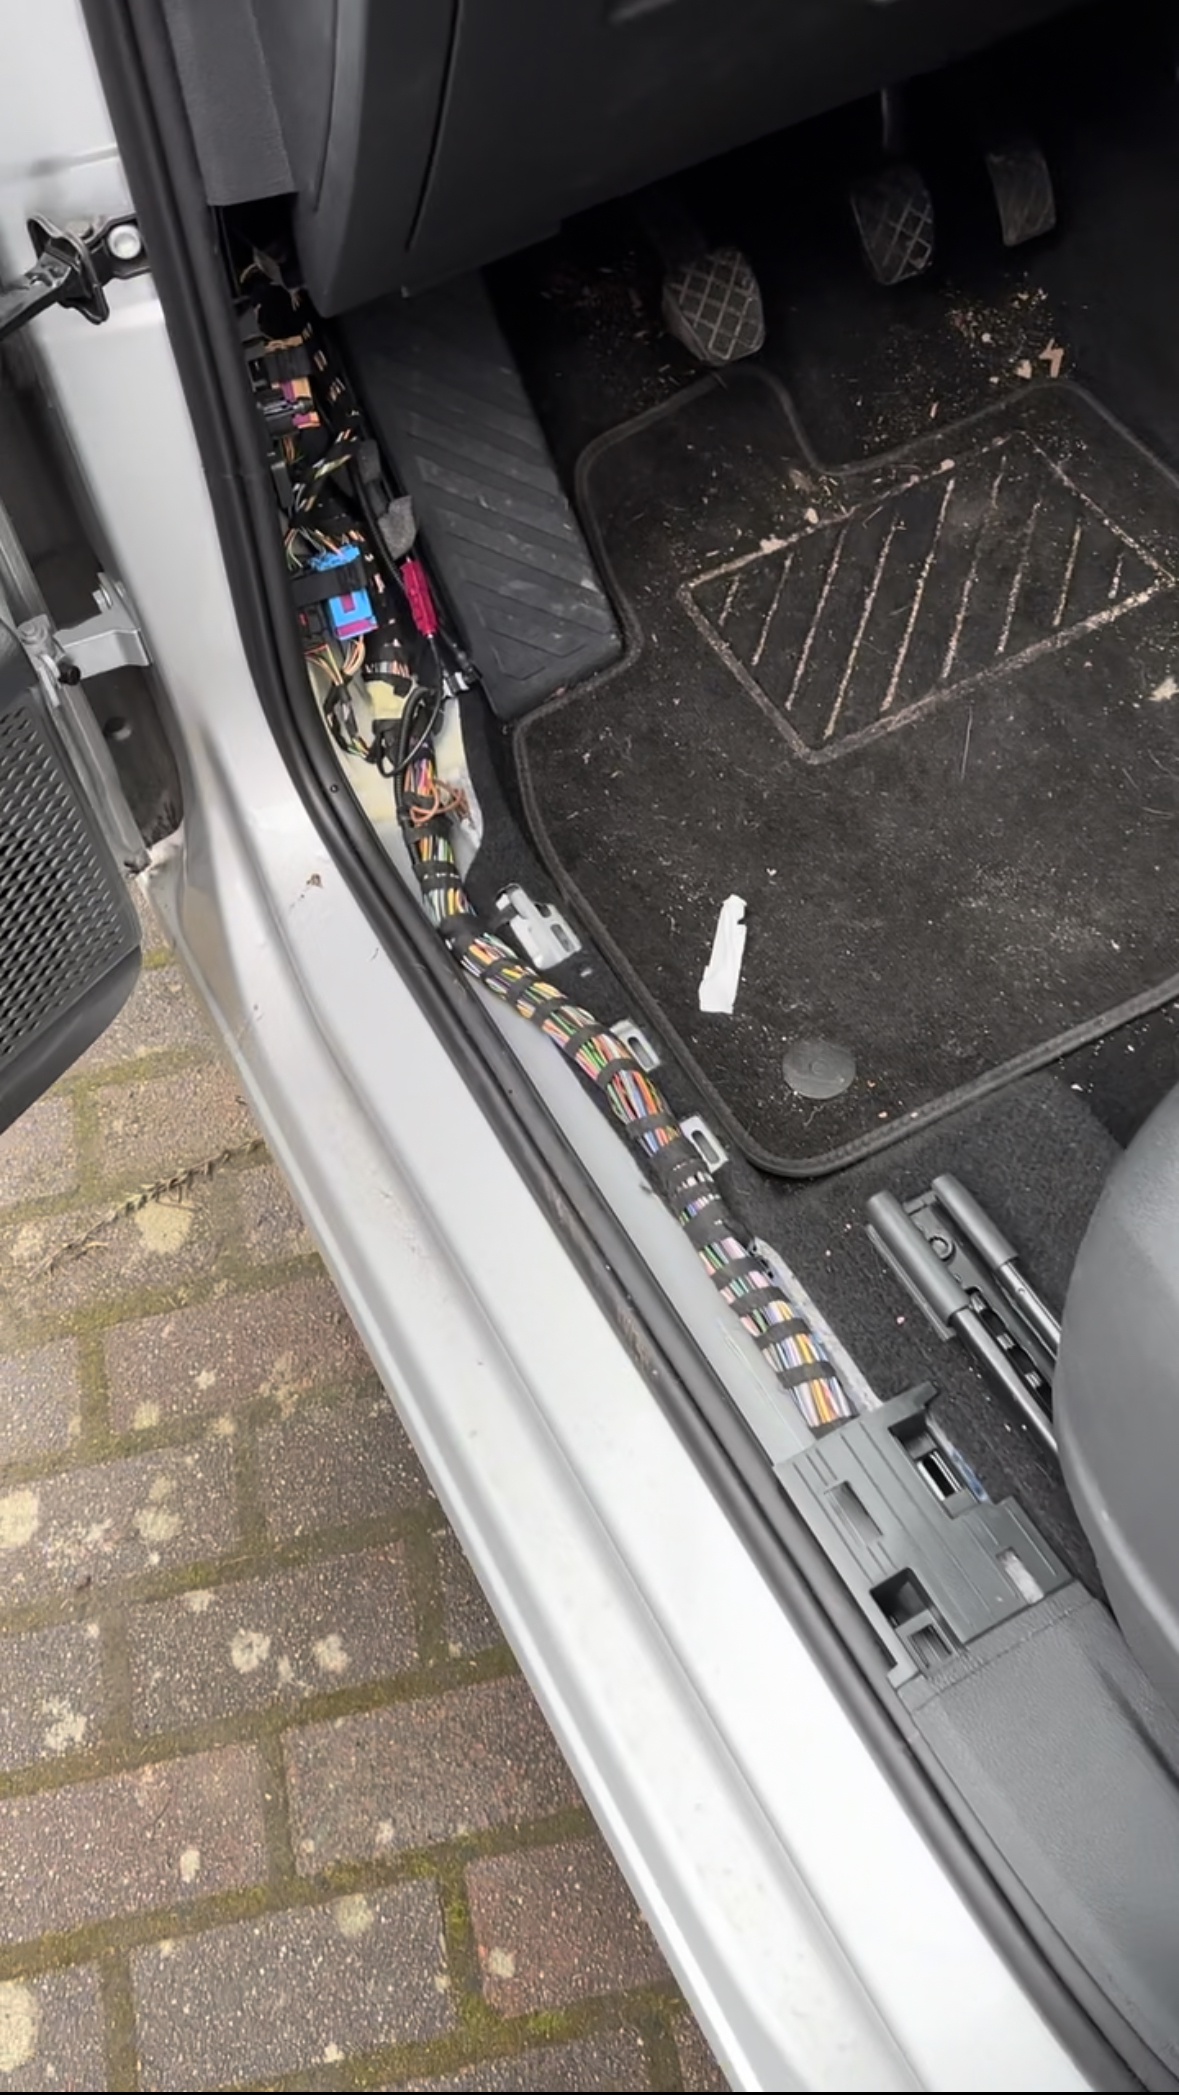
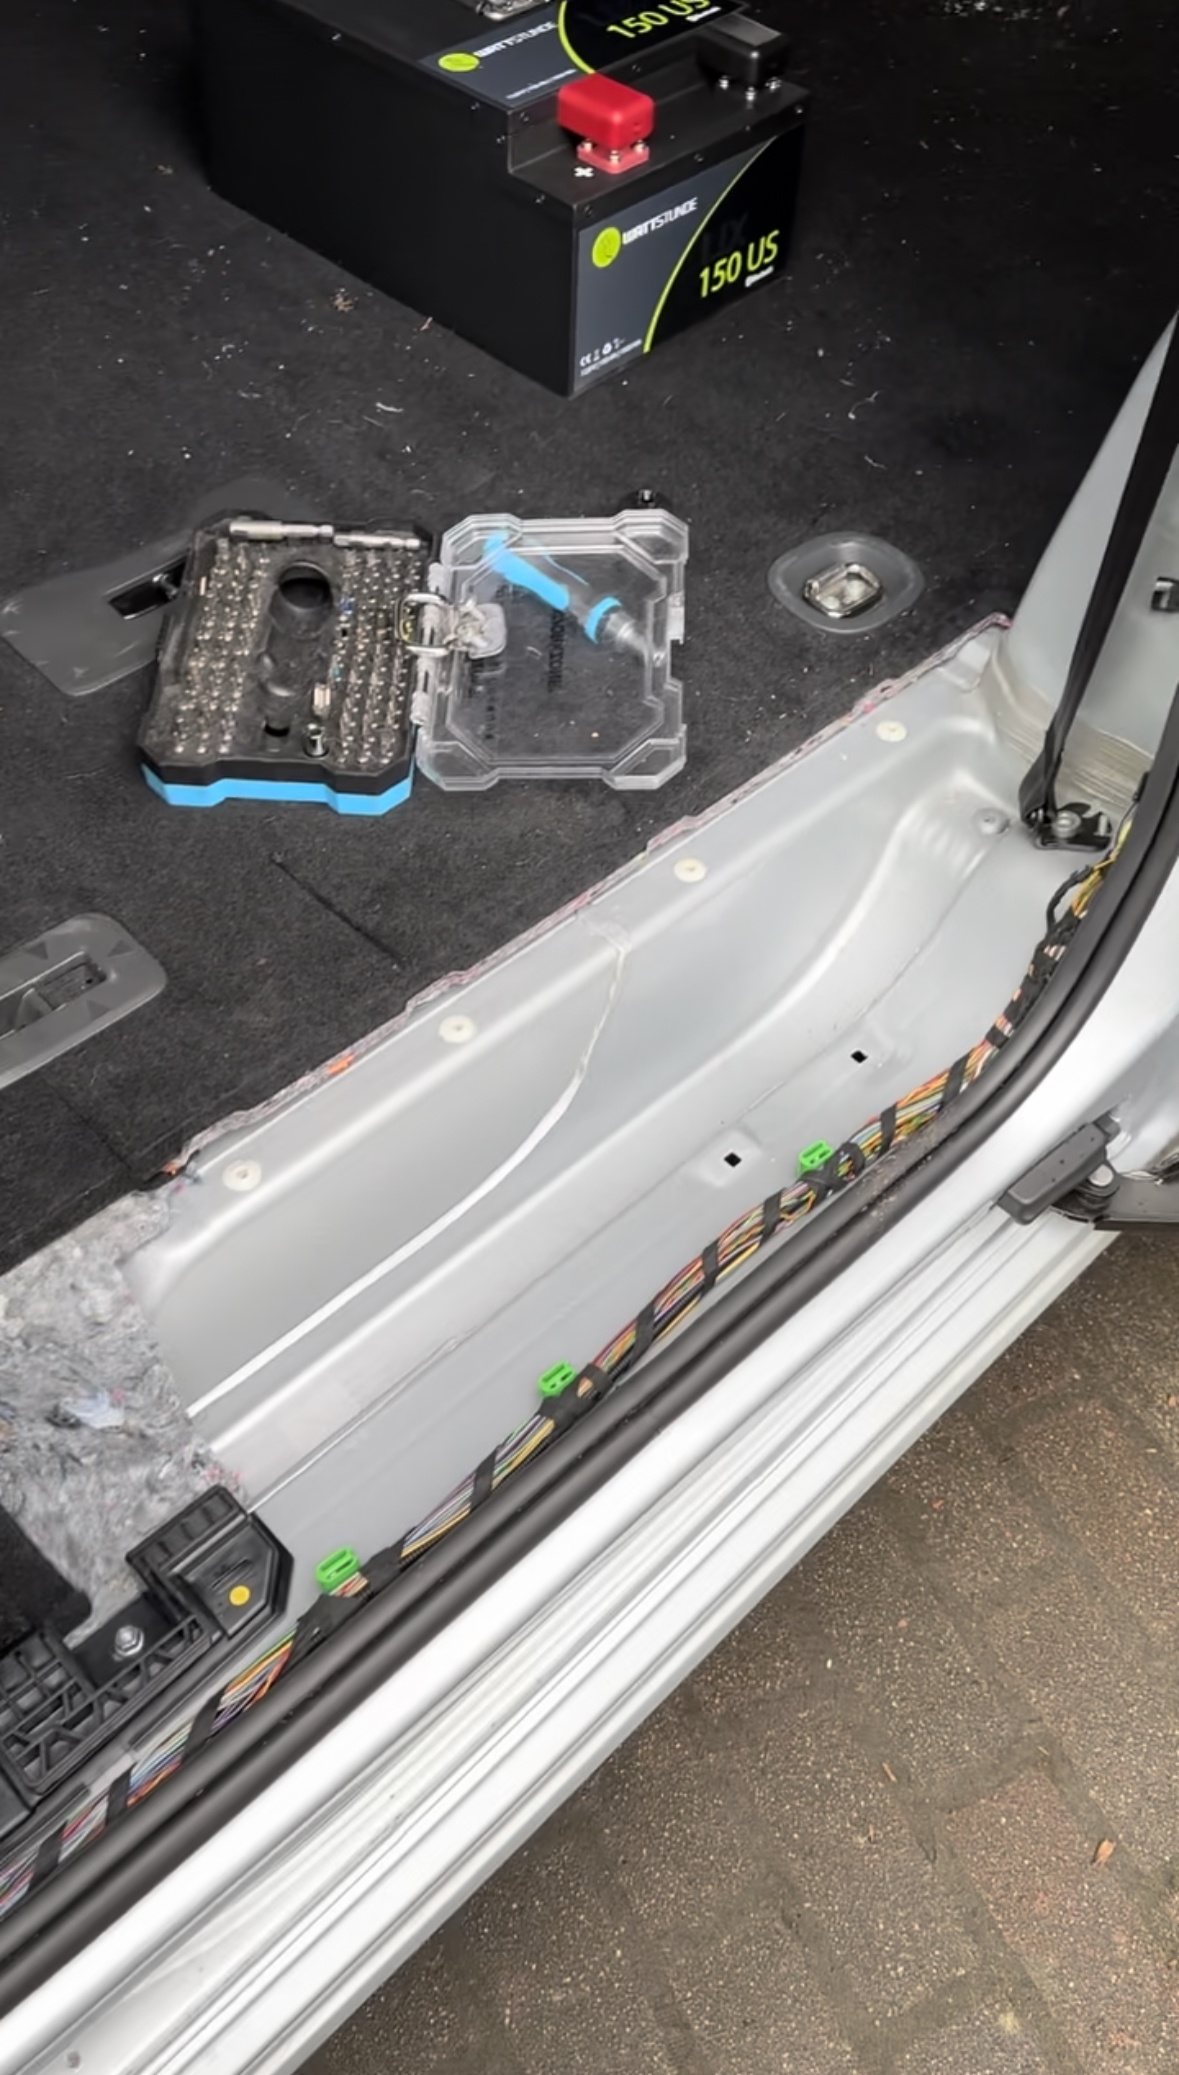
I decided to install the setup behind my driver's seat in the footwell. This means that all the wiring runs along the left-hand side of the vehicle. To lay all the cables properly, we first removed the paneling. To do this, we took out the left side panel in the trunk and removed the paneling in the foot area of the driver's door and the left sliding door.
Cable laying
To connect everything correctly later, we first laid the cables from the footwell.
First, we laid a 16 mm² cable from the footwell up to the pop-up roof. To do this, we laid the cable along the left wheel arch and routed it up through the rear bar into the pop-up roof, as this is where the cable will later be connected to the solar panel cable guide.
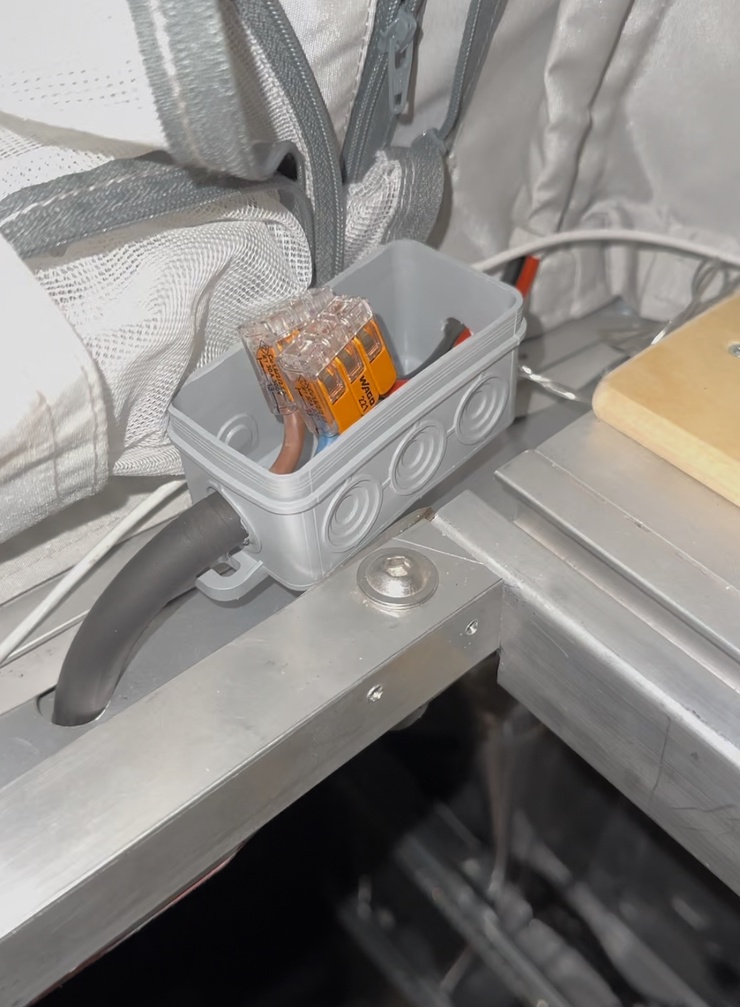
We laid the other cable, with the same diameter, from the dual battery in the hood to the alternator. To do this, we first had to disconnect and remove the starter battery. We cut the cable from the footwell through a rubber seal and laid it in the front of the hood.
Installation in footwell
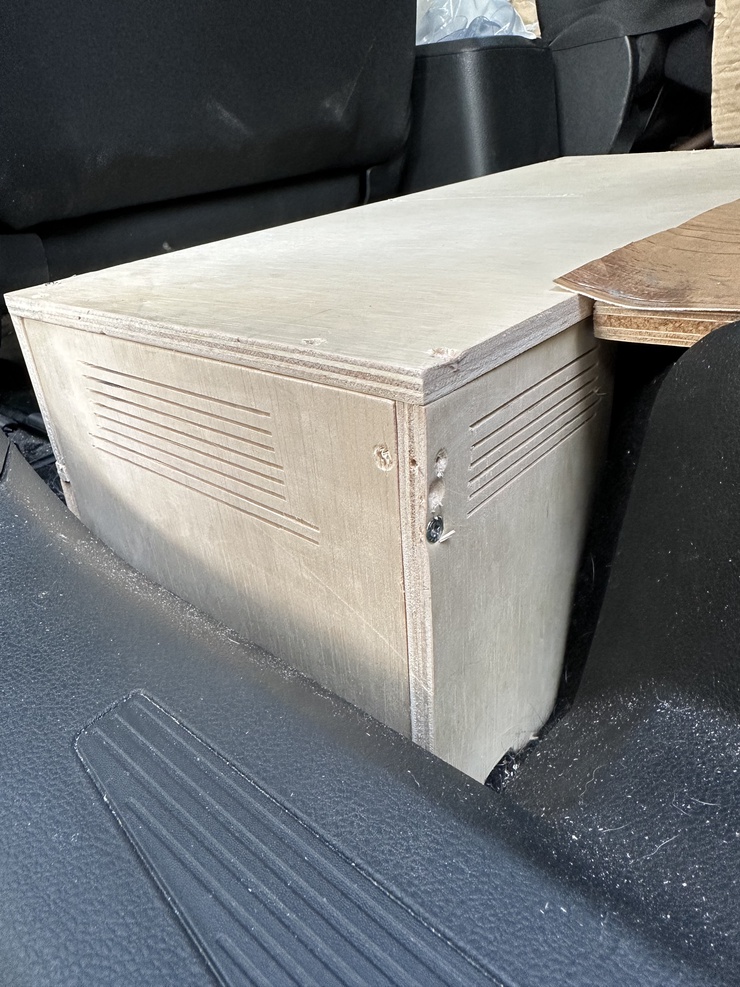
To be able to attach everything and to be able to build a protection for the system later, we first made a cardboard template for the floor of the footwell. We then transferred this to a 12 mm wooden panel and sawed it out with a jigsaw.
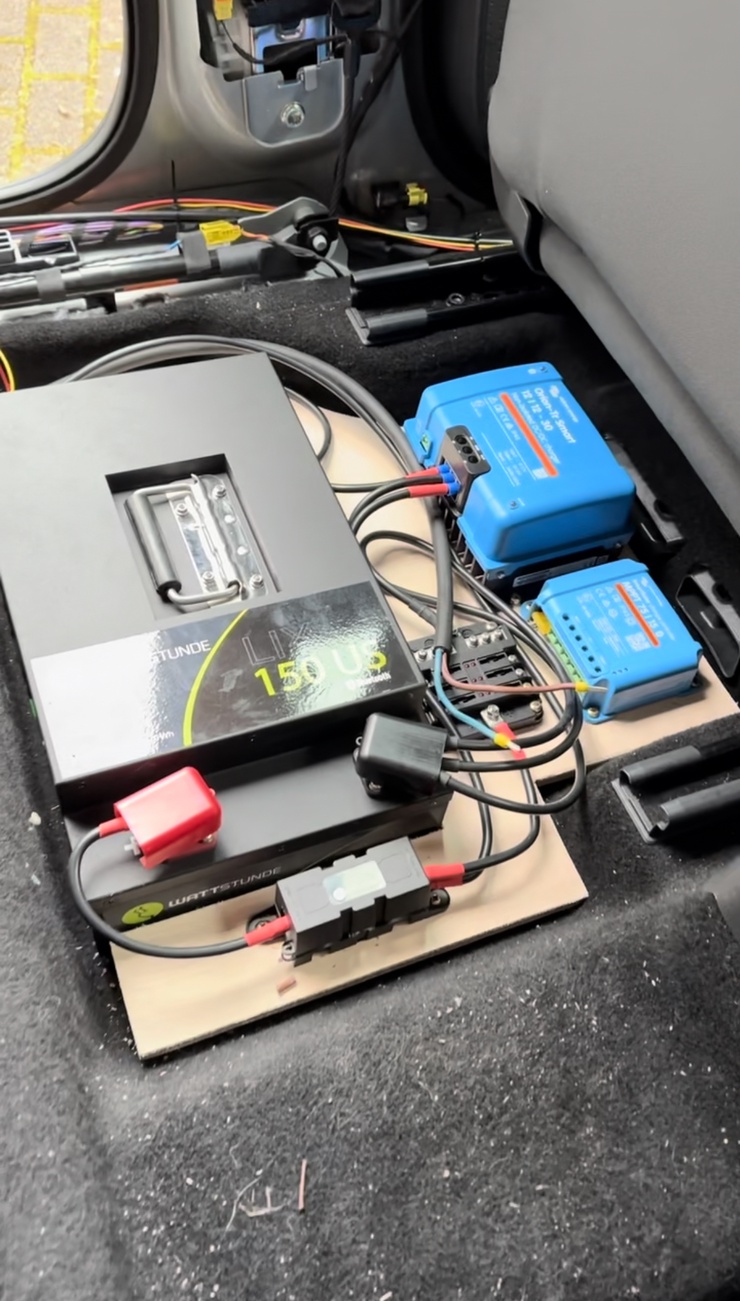
To prevent the battery from slipping, we cut out the carpet and the polystyrene underneath with a carpet knife and embedded the battery in it. We cut out the same recess on the wooden panel. The battery was then secured to the body floor with two staples and a lashing strap.
We then placed the charging booster and the solar regulator on the plate in front of the air vents. In principle, both should be mounted upright to ensure air circulation and the associated cooling. However, this was not possible in the Caddy, which is why we decided to place both in front of the fans. If it is very warm in the car, I drive with the air conditioning on anyway, which means that the charge booster is sufficiently cooled during the journey. If I am stationary, only the solar regulator is used, which does not generate as much heat as the booster.
I have also clarified the installation while lying down with the technicians from Wattstunde.
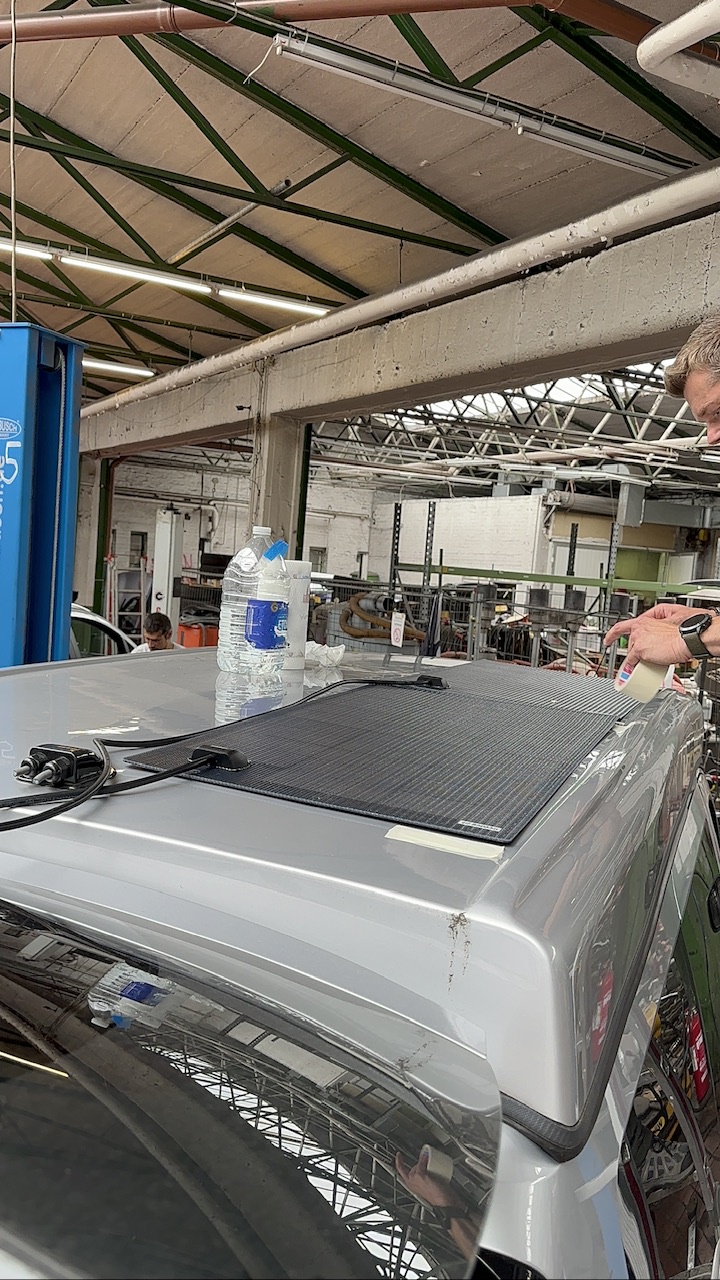
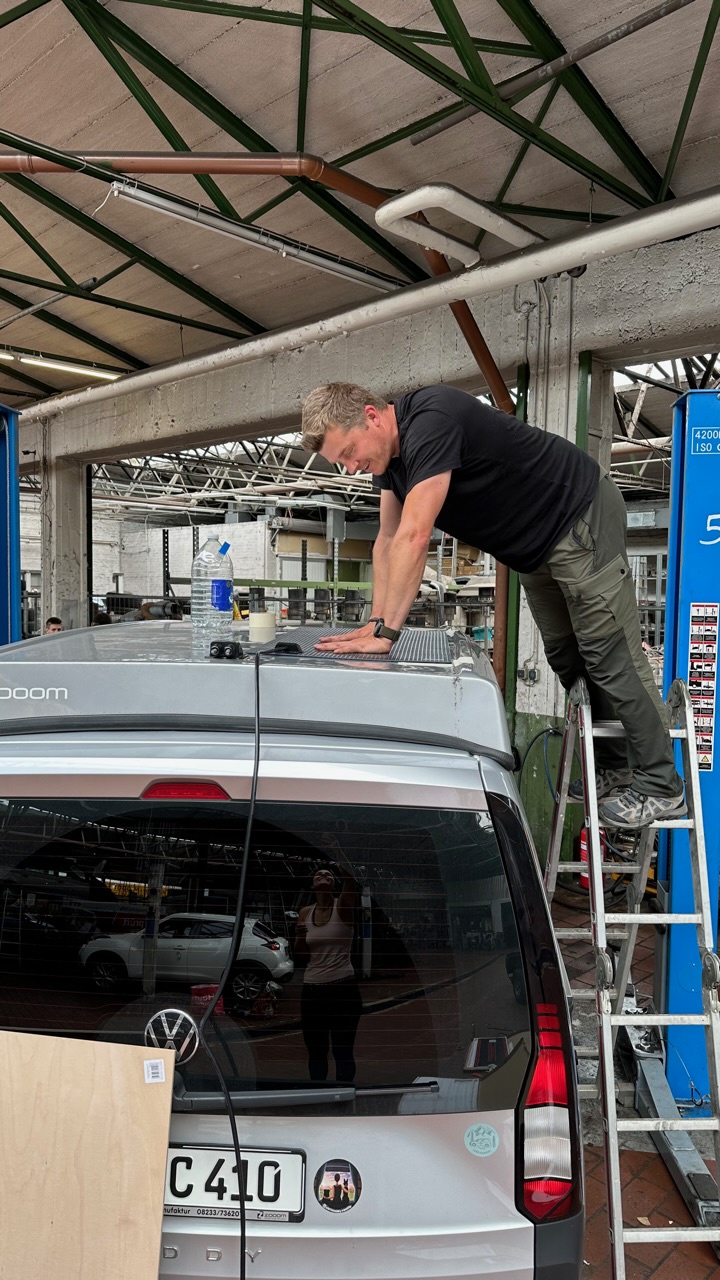
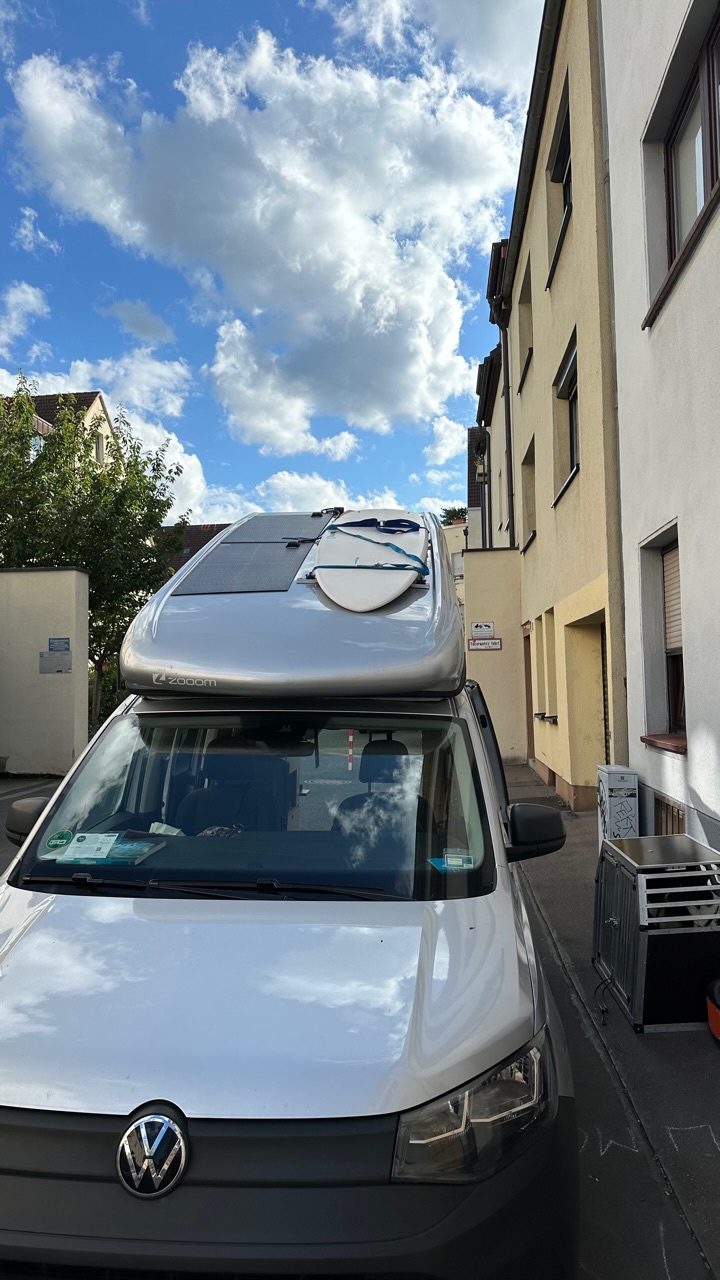
Install solar
Before you stick the panels on, connect them once to the cables of the solar controller and check in the Victron app whether they are working. If this is the case - which I assume it is - you can stick the panels on.
Take a look at where you want to place the panels beforehand and mark the position on the edges with masking tape.
To stick the panels on, it should of course be dry and between +15° C and +25° C so that the adhesive tapes can develop their full adhesive strength.
First you should pre-wash the roof once with water and some washing-up liquid and then clean it again with e.g. BetaClean or white spirit and a lint-, perfume- and plasticizer-free cleaning cloth. Do not touch the adhesive surface with your fingers again.
You can then stick the adhesive tape to the underside of the solar panel. This should be tight but not overstretched. Avoid air pockets and cut off the initial pieces that you have touched with your fingers, as these are less adhesive.
The adhesive tape should be pressed on with approx. 20 N/cm².
Then remove the protective cover from the adhesive tape in one go, taking care not to touch the adhesive surface. The panel should be applied promptly to avoid soiling the adhesive tape.
Pay attention to the positioning, as the high adhesive strength means that it cannot be removed again.
After attaching to the roof, the solar panel should be pressed down evenly.
System test
Once you have connected everything correctly, you can carry out a self-test and start the car once.
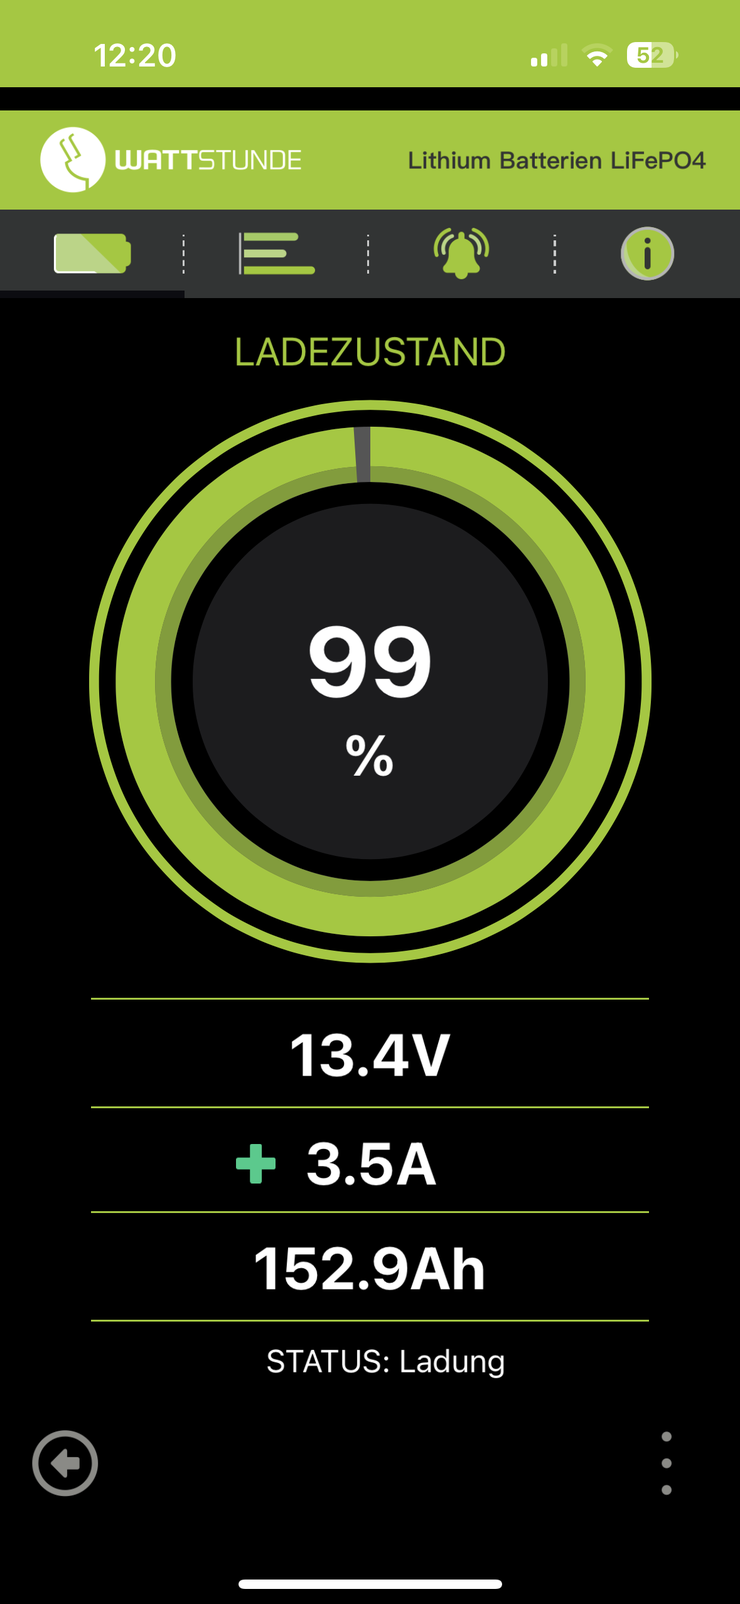
You can access the overview of the charge booster and the battery via the Victron app or the Wattstunden app. The battery should now show Charge. For some vehicles, you still need to configure the engine shutdown detection in the charge booster app. To do this, it is best to read the charging booster manual in detail.
If the solar panels are connected, you should see a power input for the solar controller in the Victron app. Of course, you need to be outside and preferably with some sun ;)
Protecting the setup
Of course, it is important to secure everything properly at the end of the installation. I attached the battery to the body at two fixing points and a tensioning strap and built a wooden box around the rest. I cut air slots in the side walls to prevent heat build-up. At the front, towards the ventilation, I left it completely open. This prevents dirt from getting into the individual components and you can also put something on top of the setup.